DIY Diaper Cake
This has to be the most universal and acceptable gift to give at any baby shower. Every baby needs diapers! And the best part, is that you can customize it and get really personal and creative. You can go completely simple, like I did, or extremely extravagant! The outcomes are endless!
Here’s my step by step guide on how to make your very own diaper cake!
disclaimer: The lighting in these photos are not the best and I didn’t feel the need to edit it because I really wanted everyone to see the process without any editing.
Materials:
Some type of card board or base that is sturdy enough to create your diaper cake on and that you can transport it on
empty paper towel roll
diapers! I bought a box of 120, size 1 diapers for my size cake
any decorations of your choosing (* I got a lot of mine out of the gift section)
scissors, tape, hot glue gun, big rubber bands
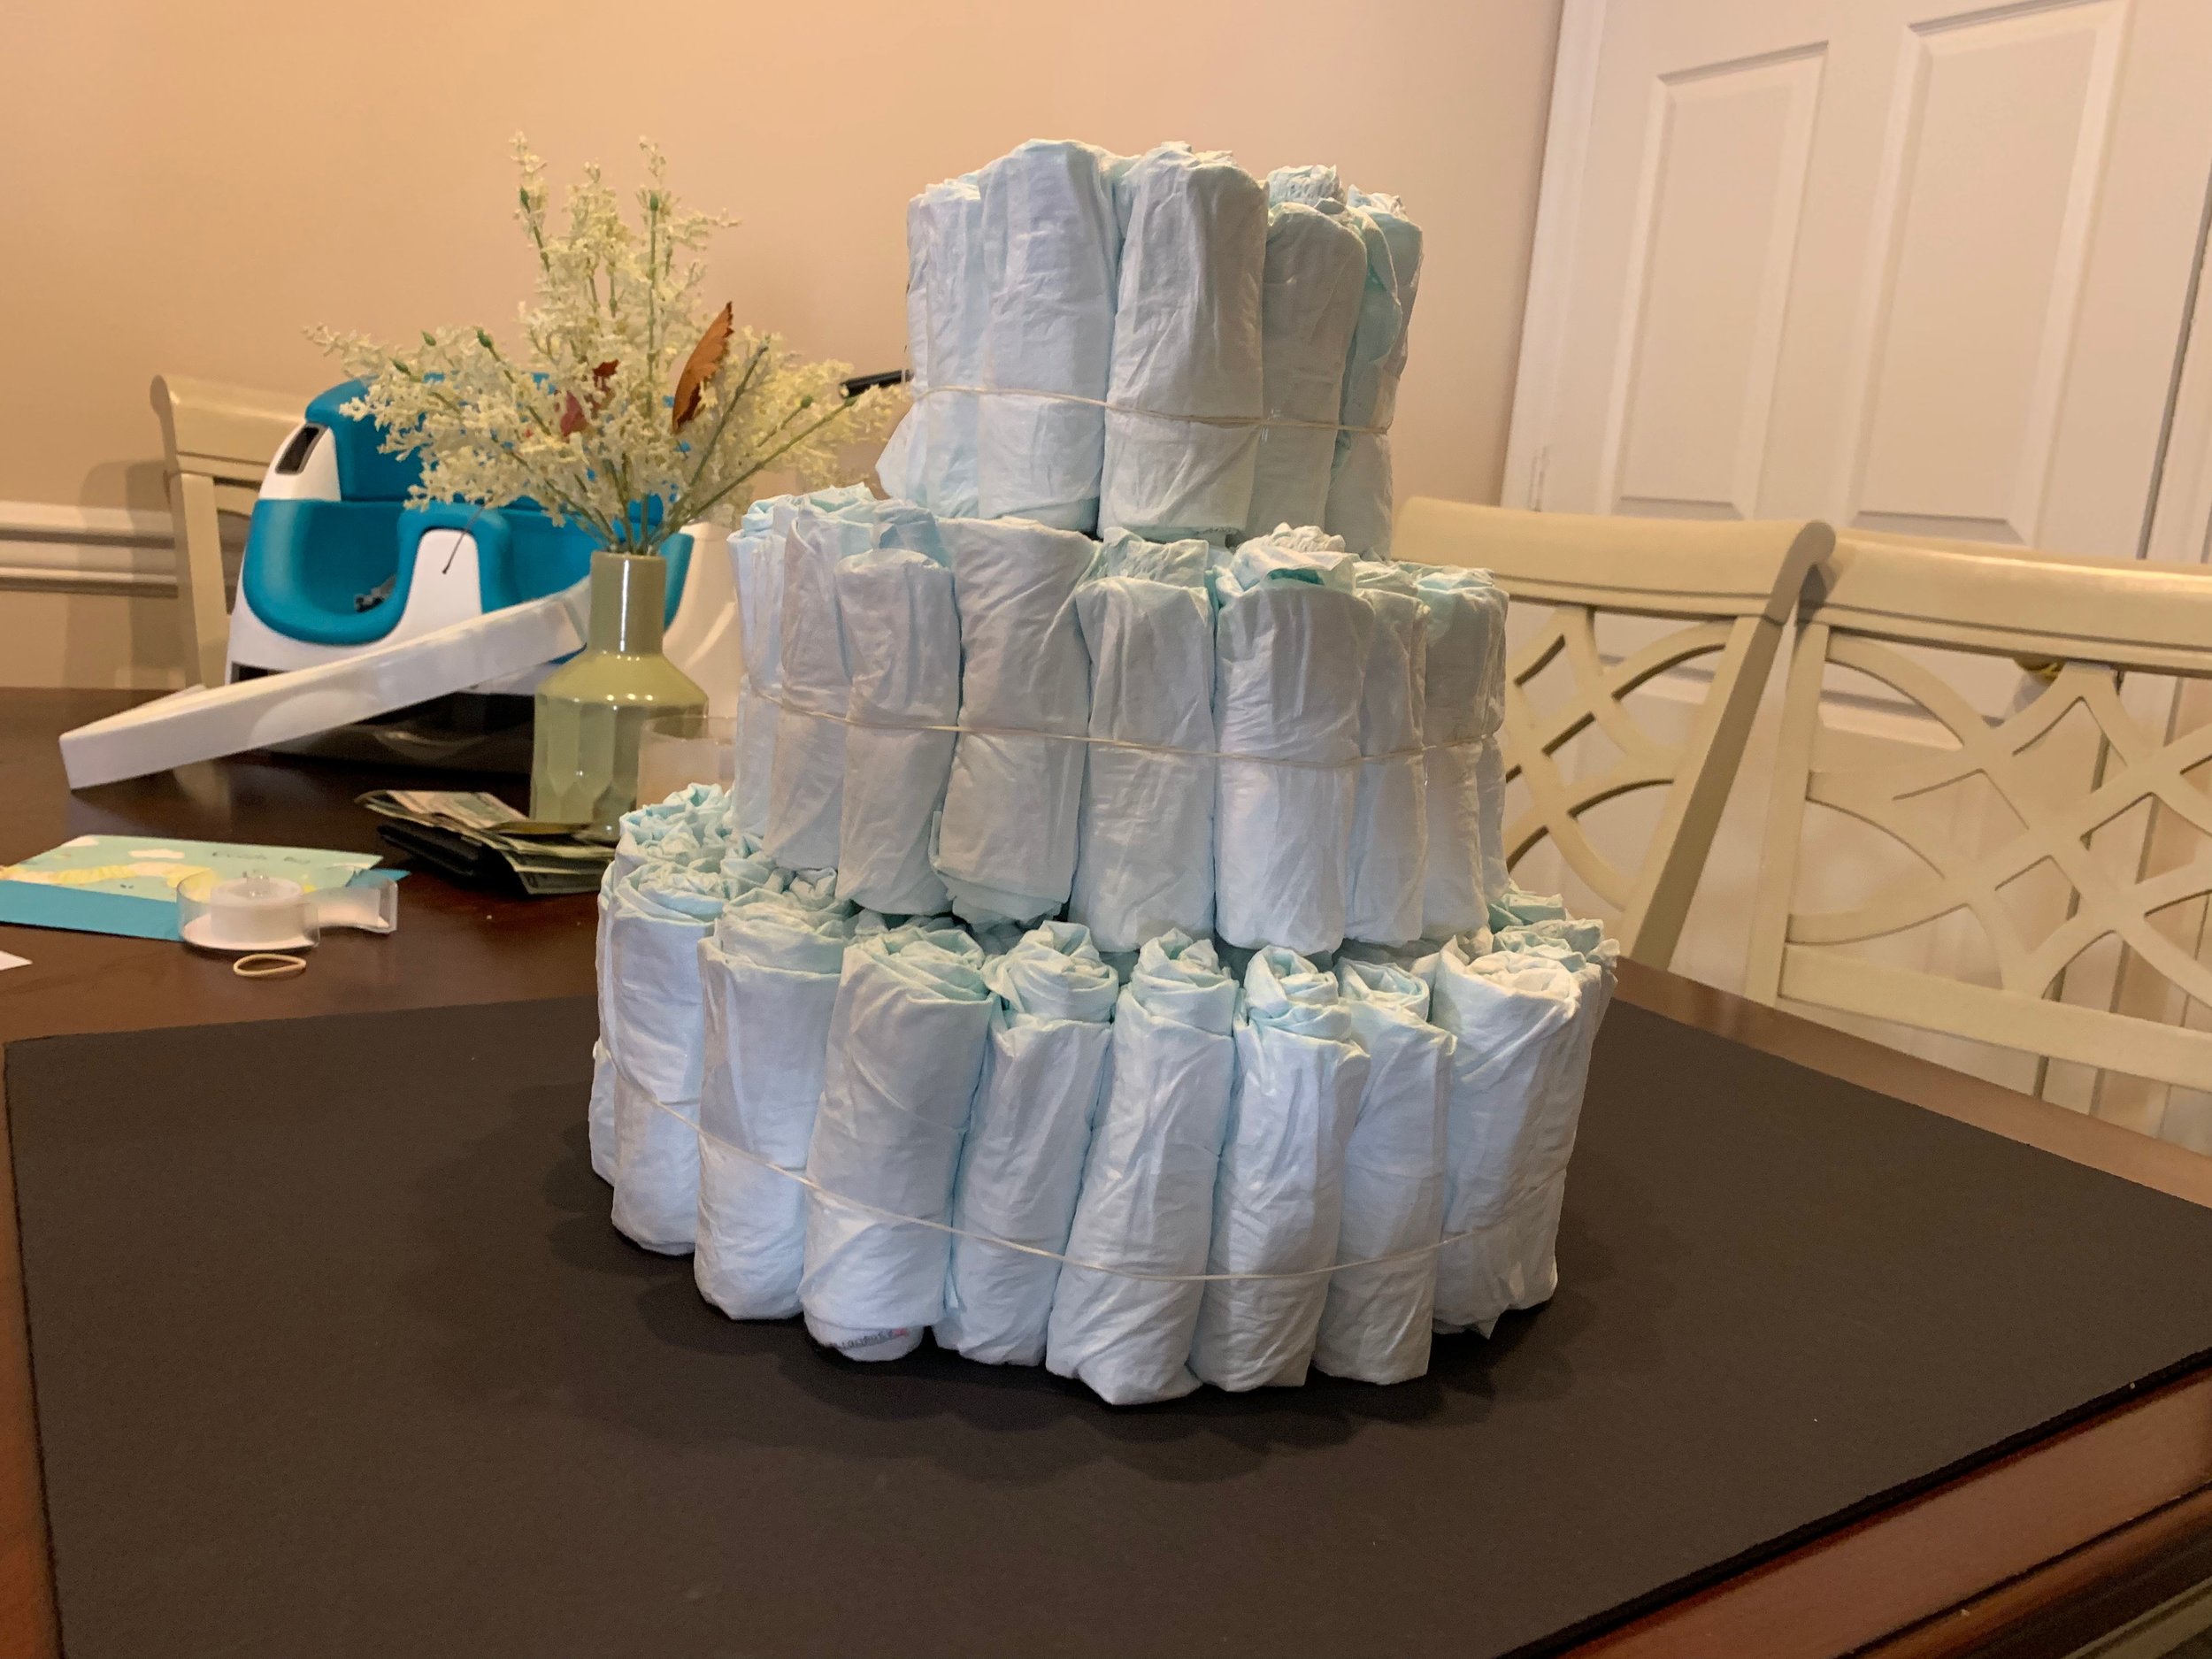
Step One: Take the giant piece of cardboard and place on a flat surface. I was originally going to cut this cardboard into a giant circle and decided not to.
Step Two: Stand the empty paper towel roll in the center of the cardboard and place a rubber band around it. The rubber band will be used in keeping the diapers in place as you add them.
Step Three: Take 7 diapers and roll them with the front being rolled inward. A.K.A no design should be shown. Add a small piece of tape to hold the roll. Try to roll each one the same, not too loose and not crazy tight. These 7 rolled diapers will be the inner part, touching the empty paper towel roll. Then wrap the rubber band around these diapers. The rubber band is what’s holding them in place.
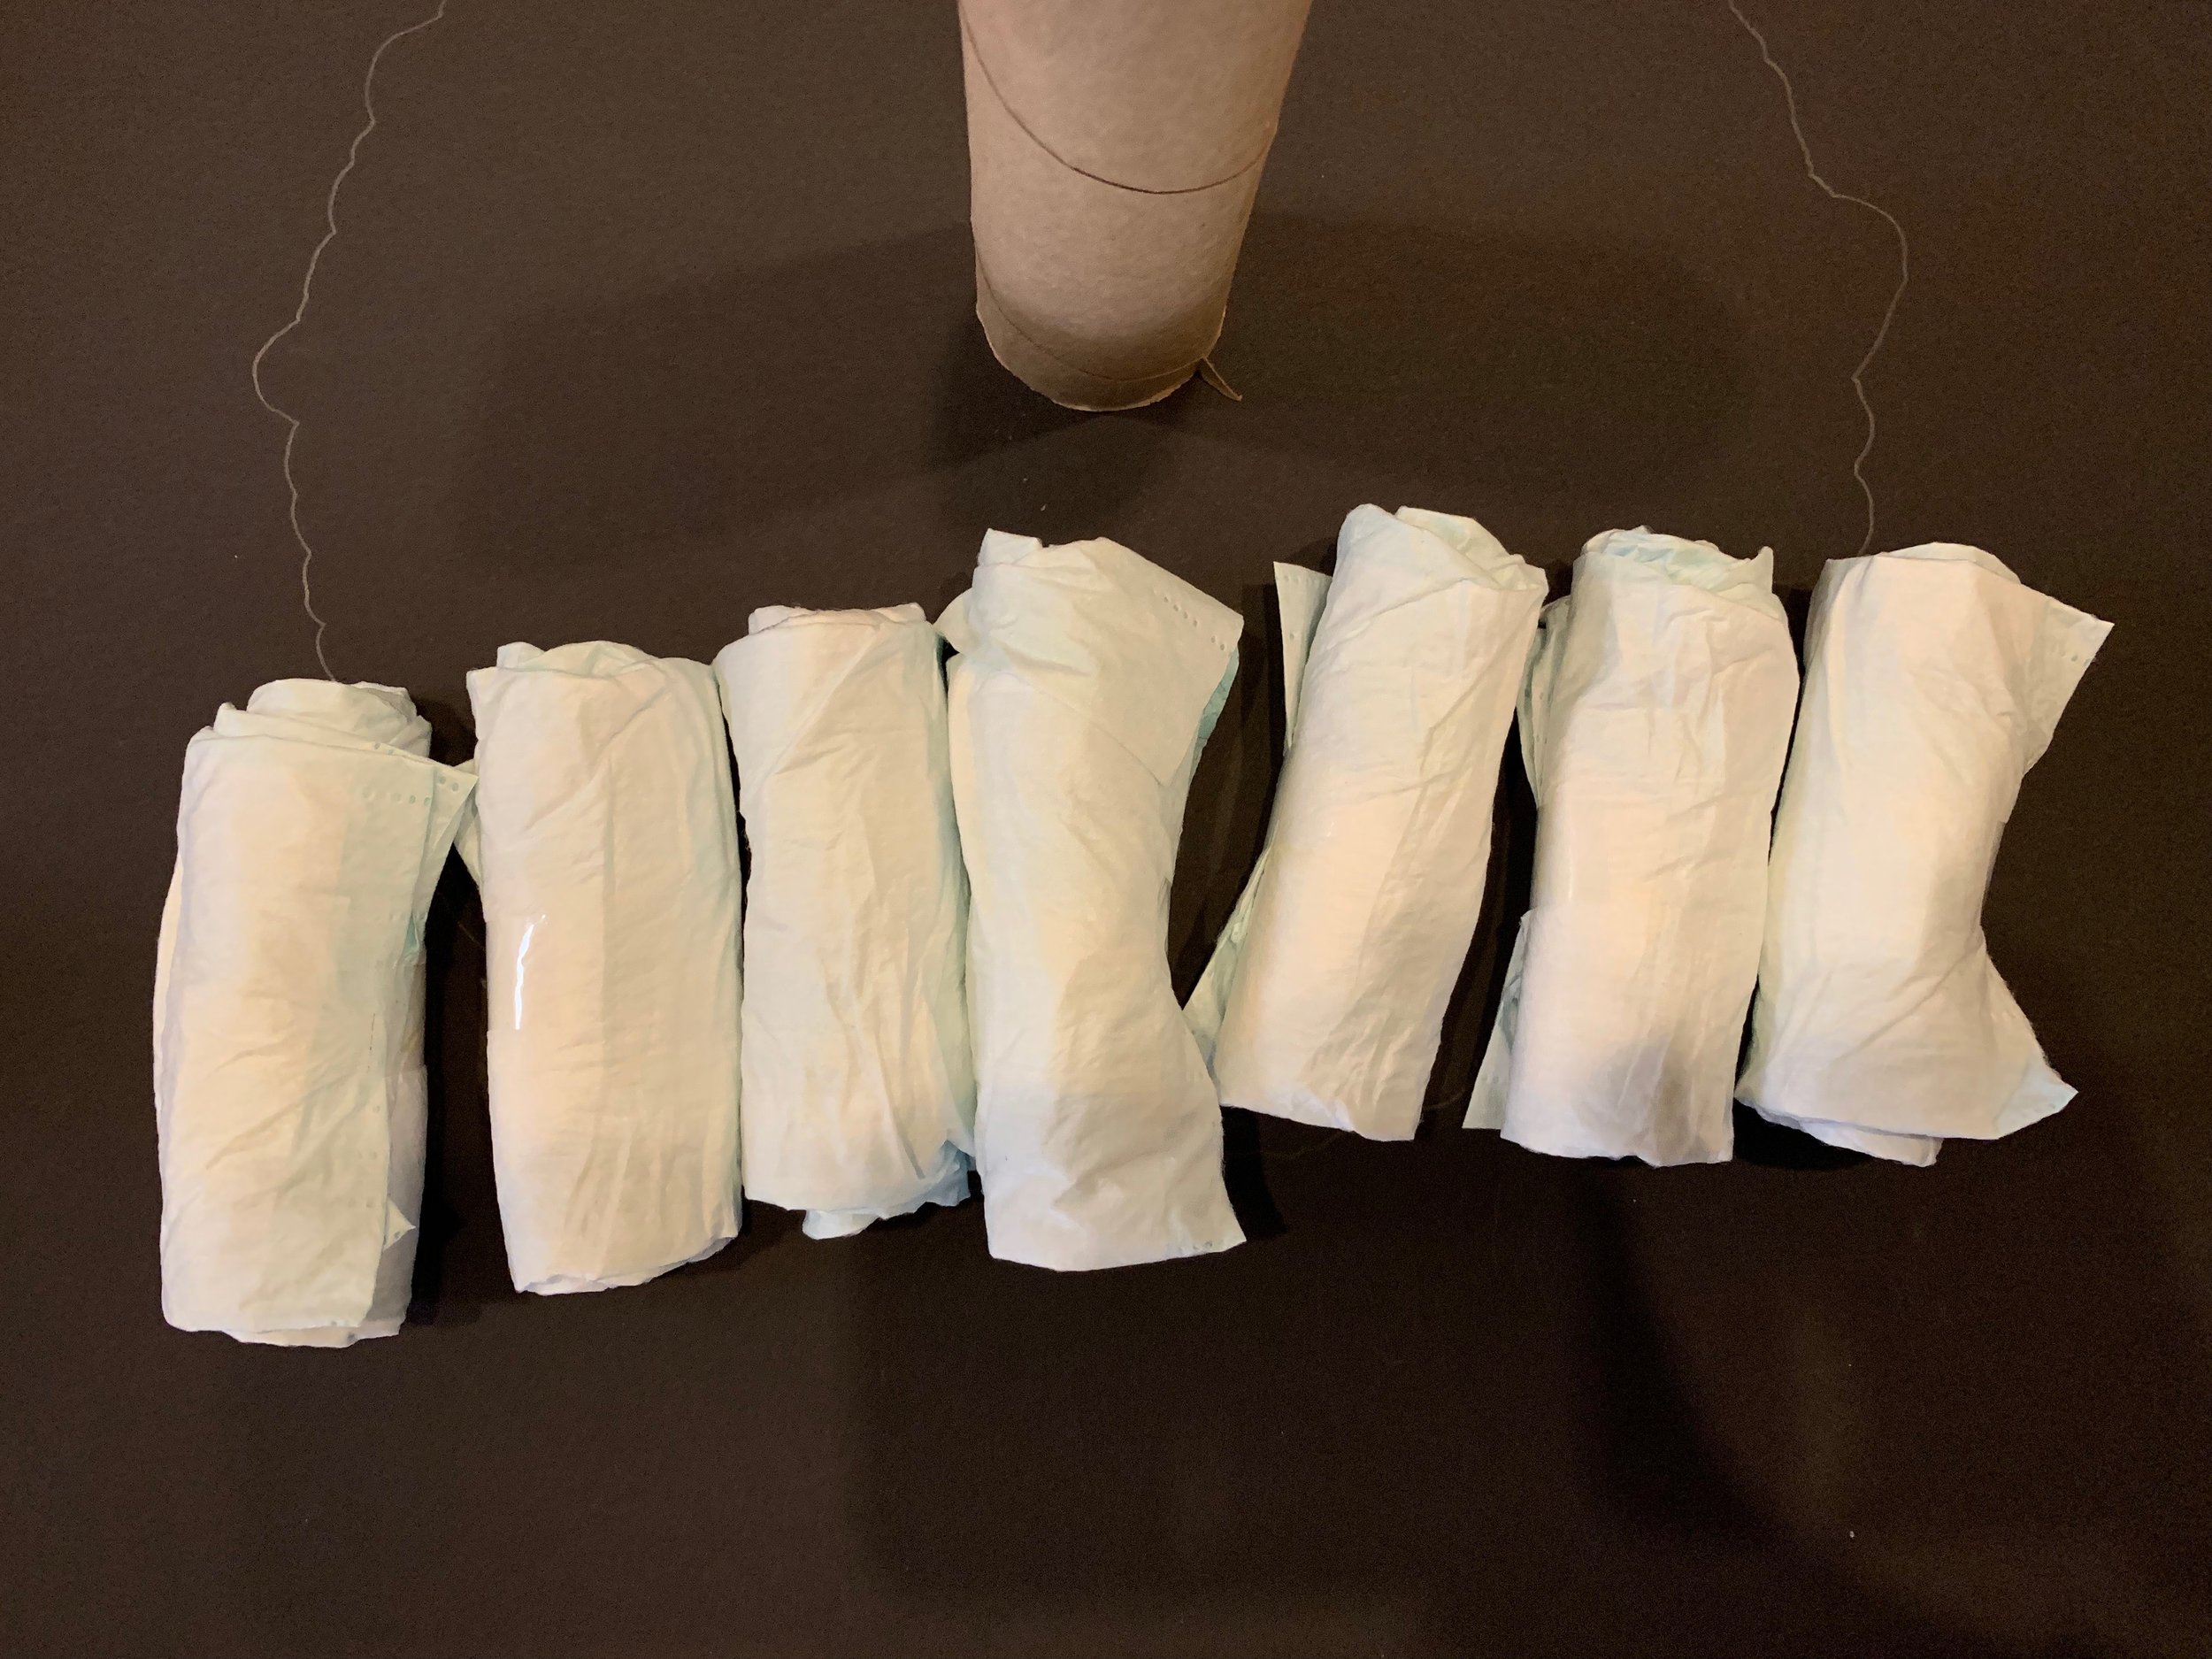
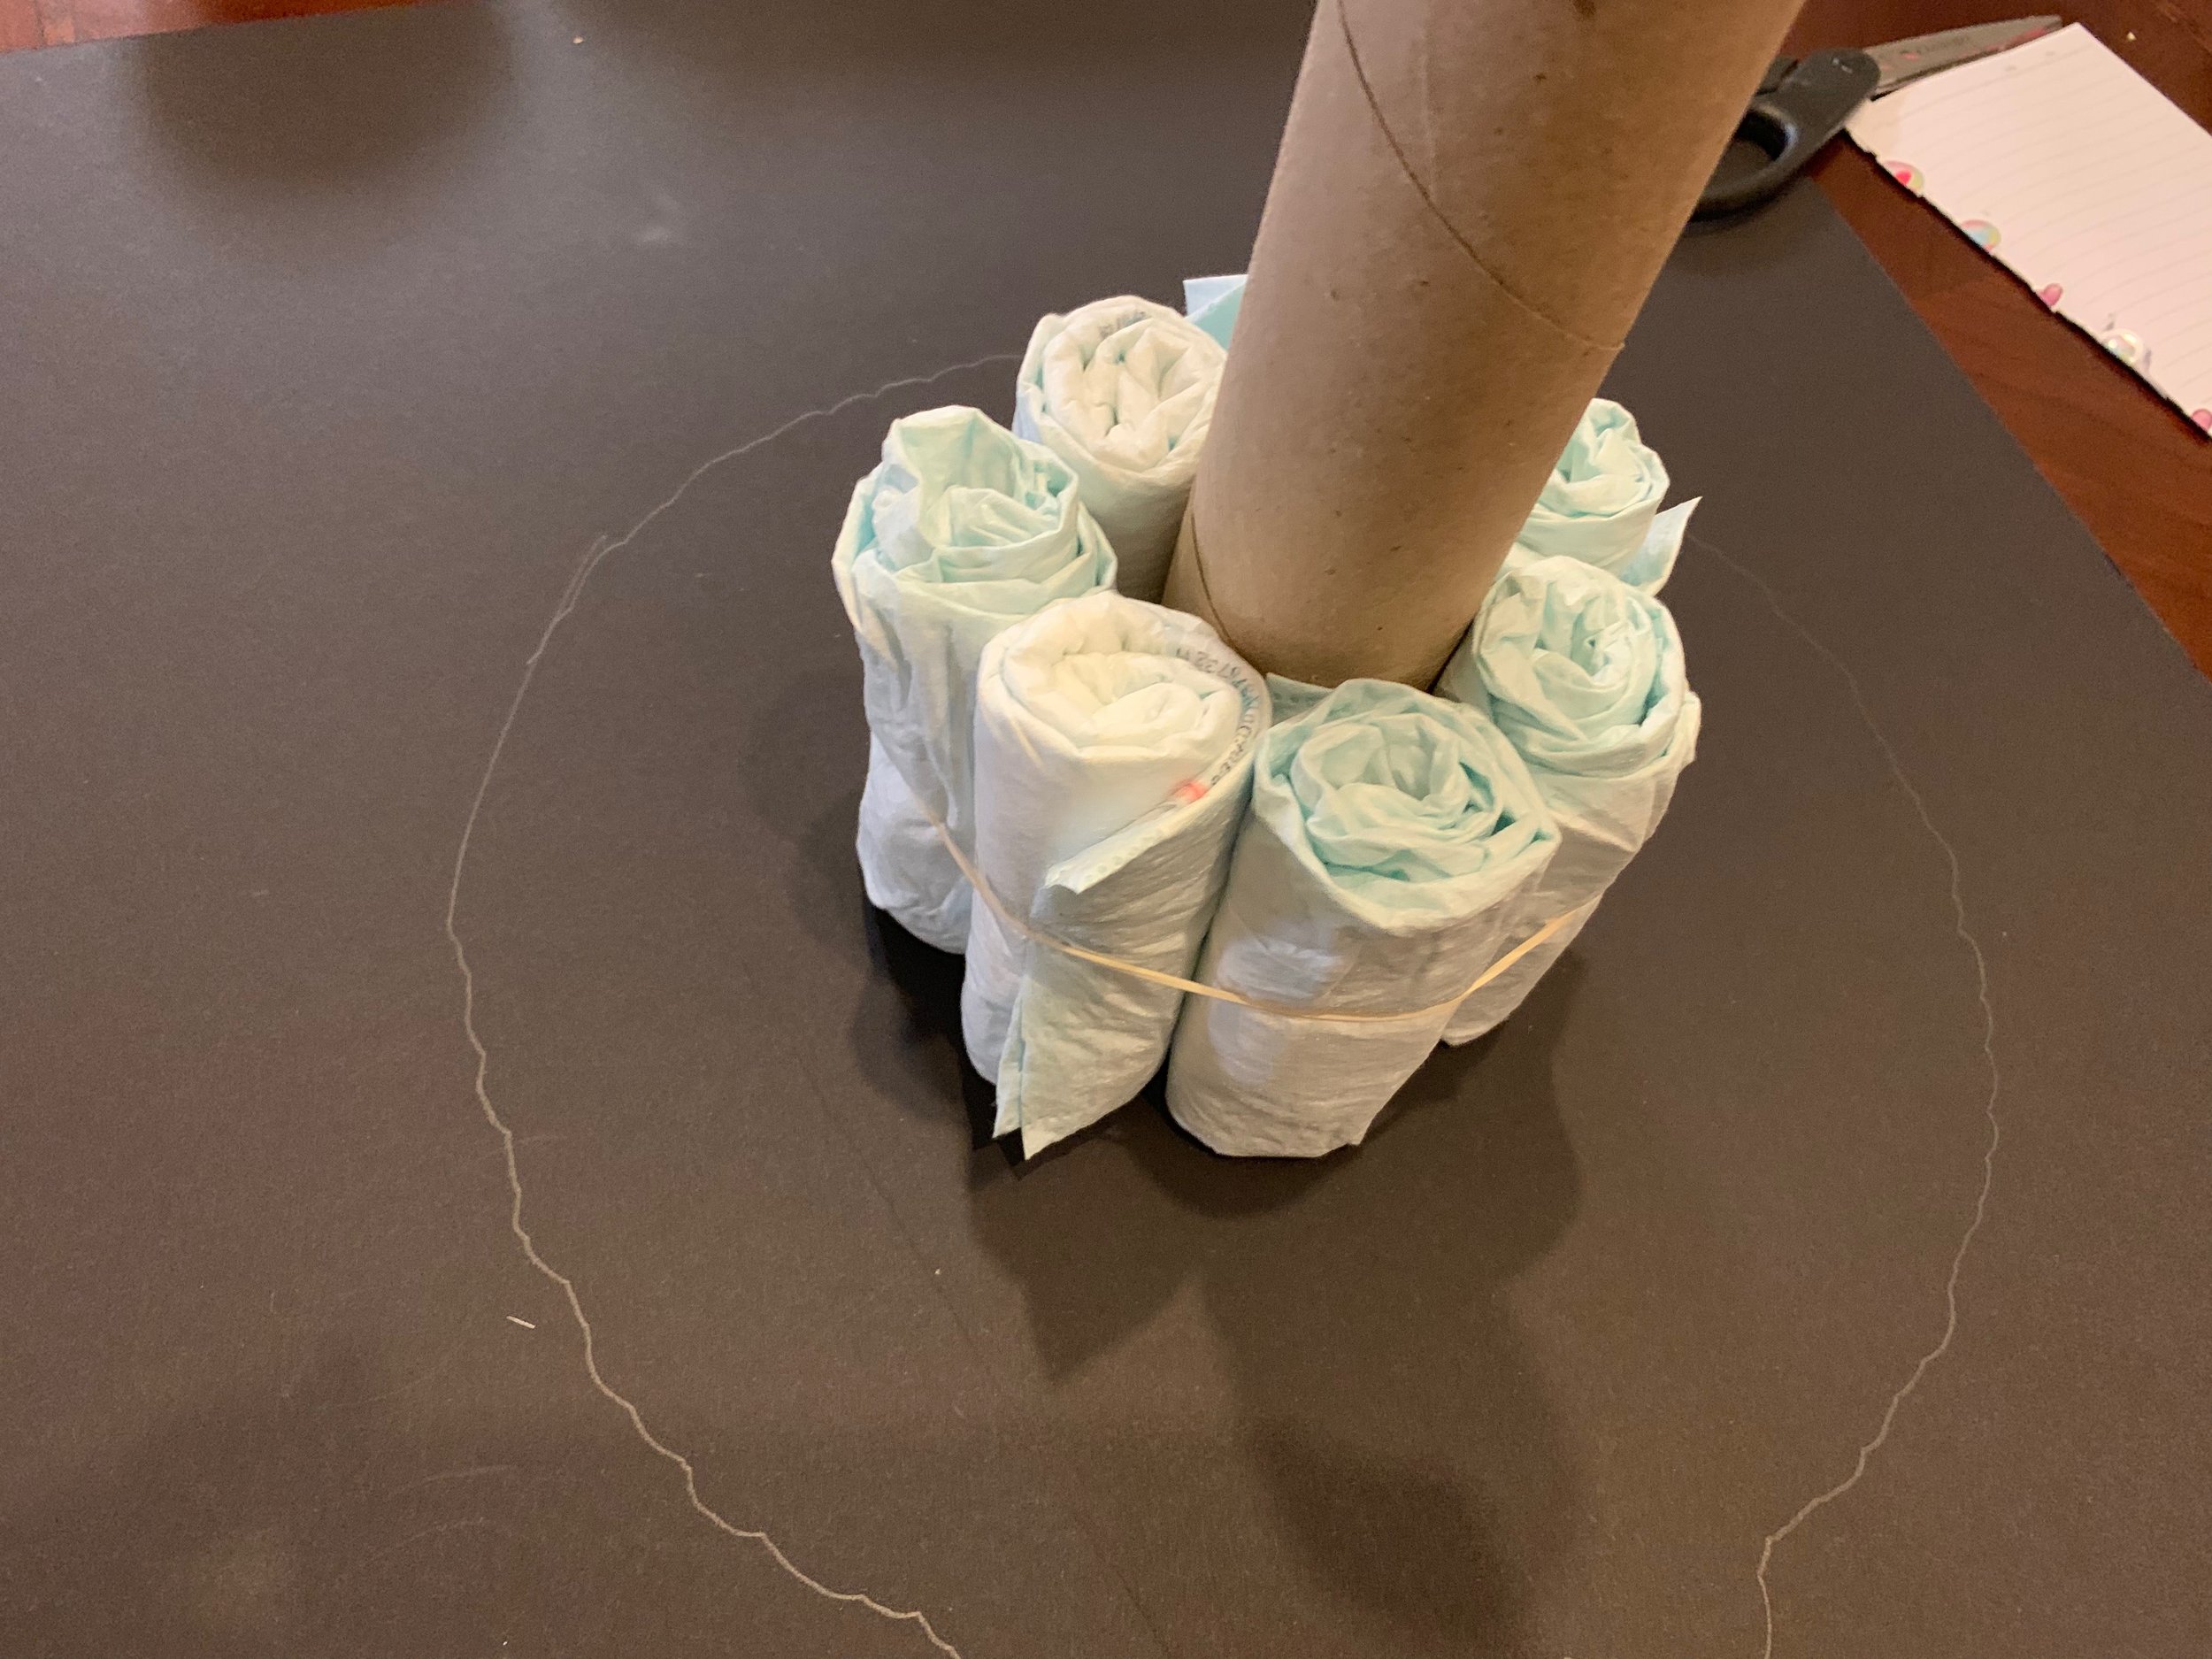
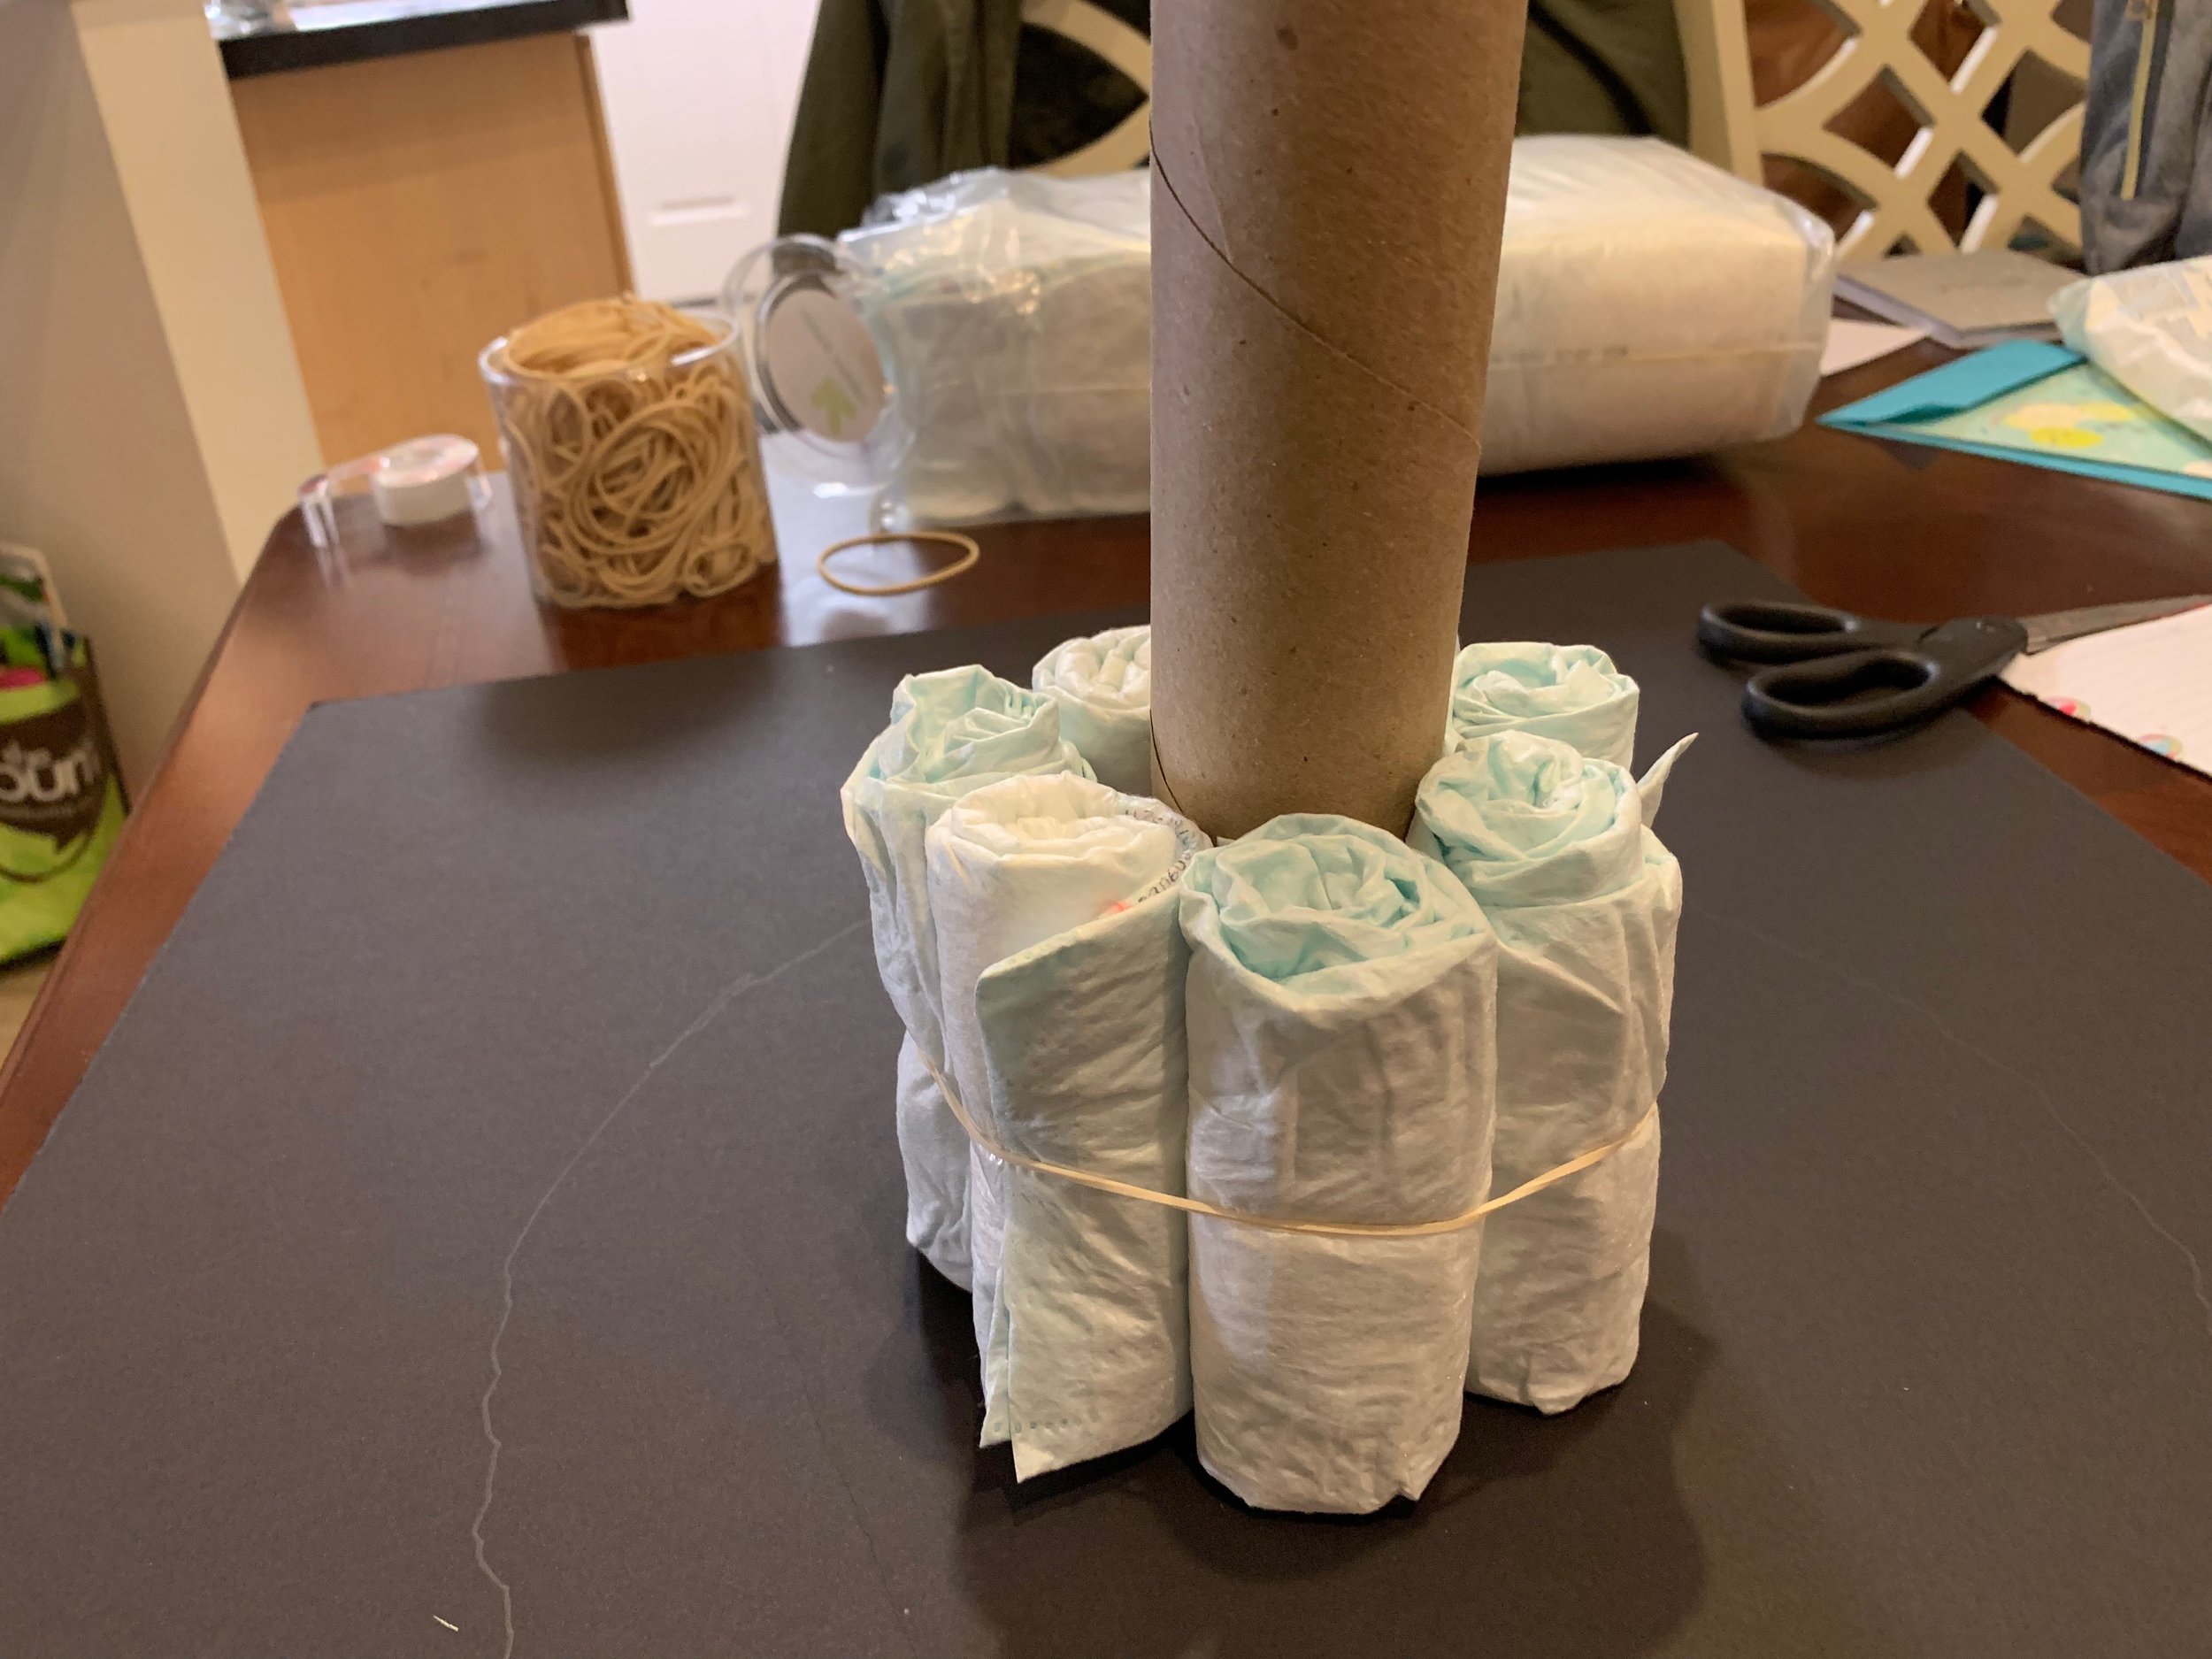
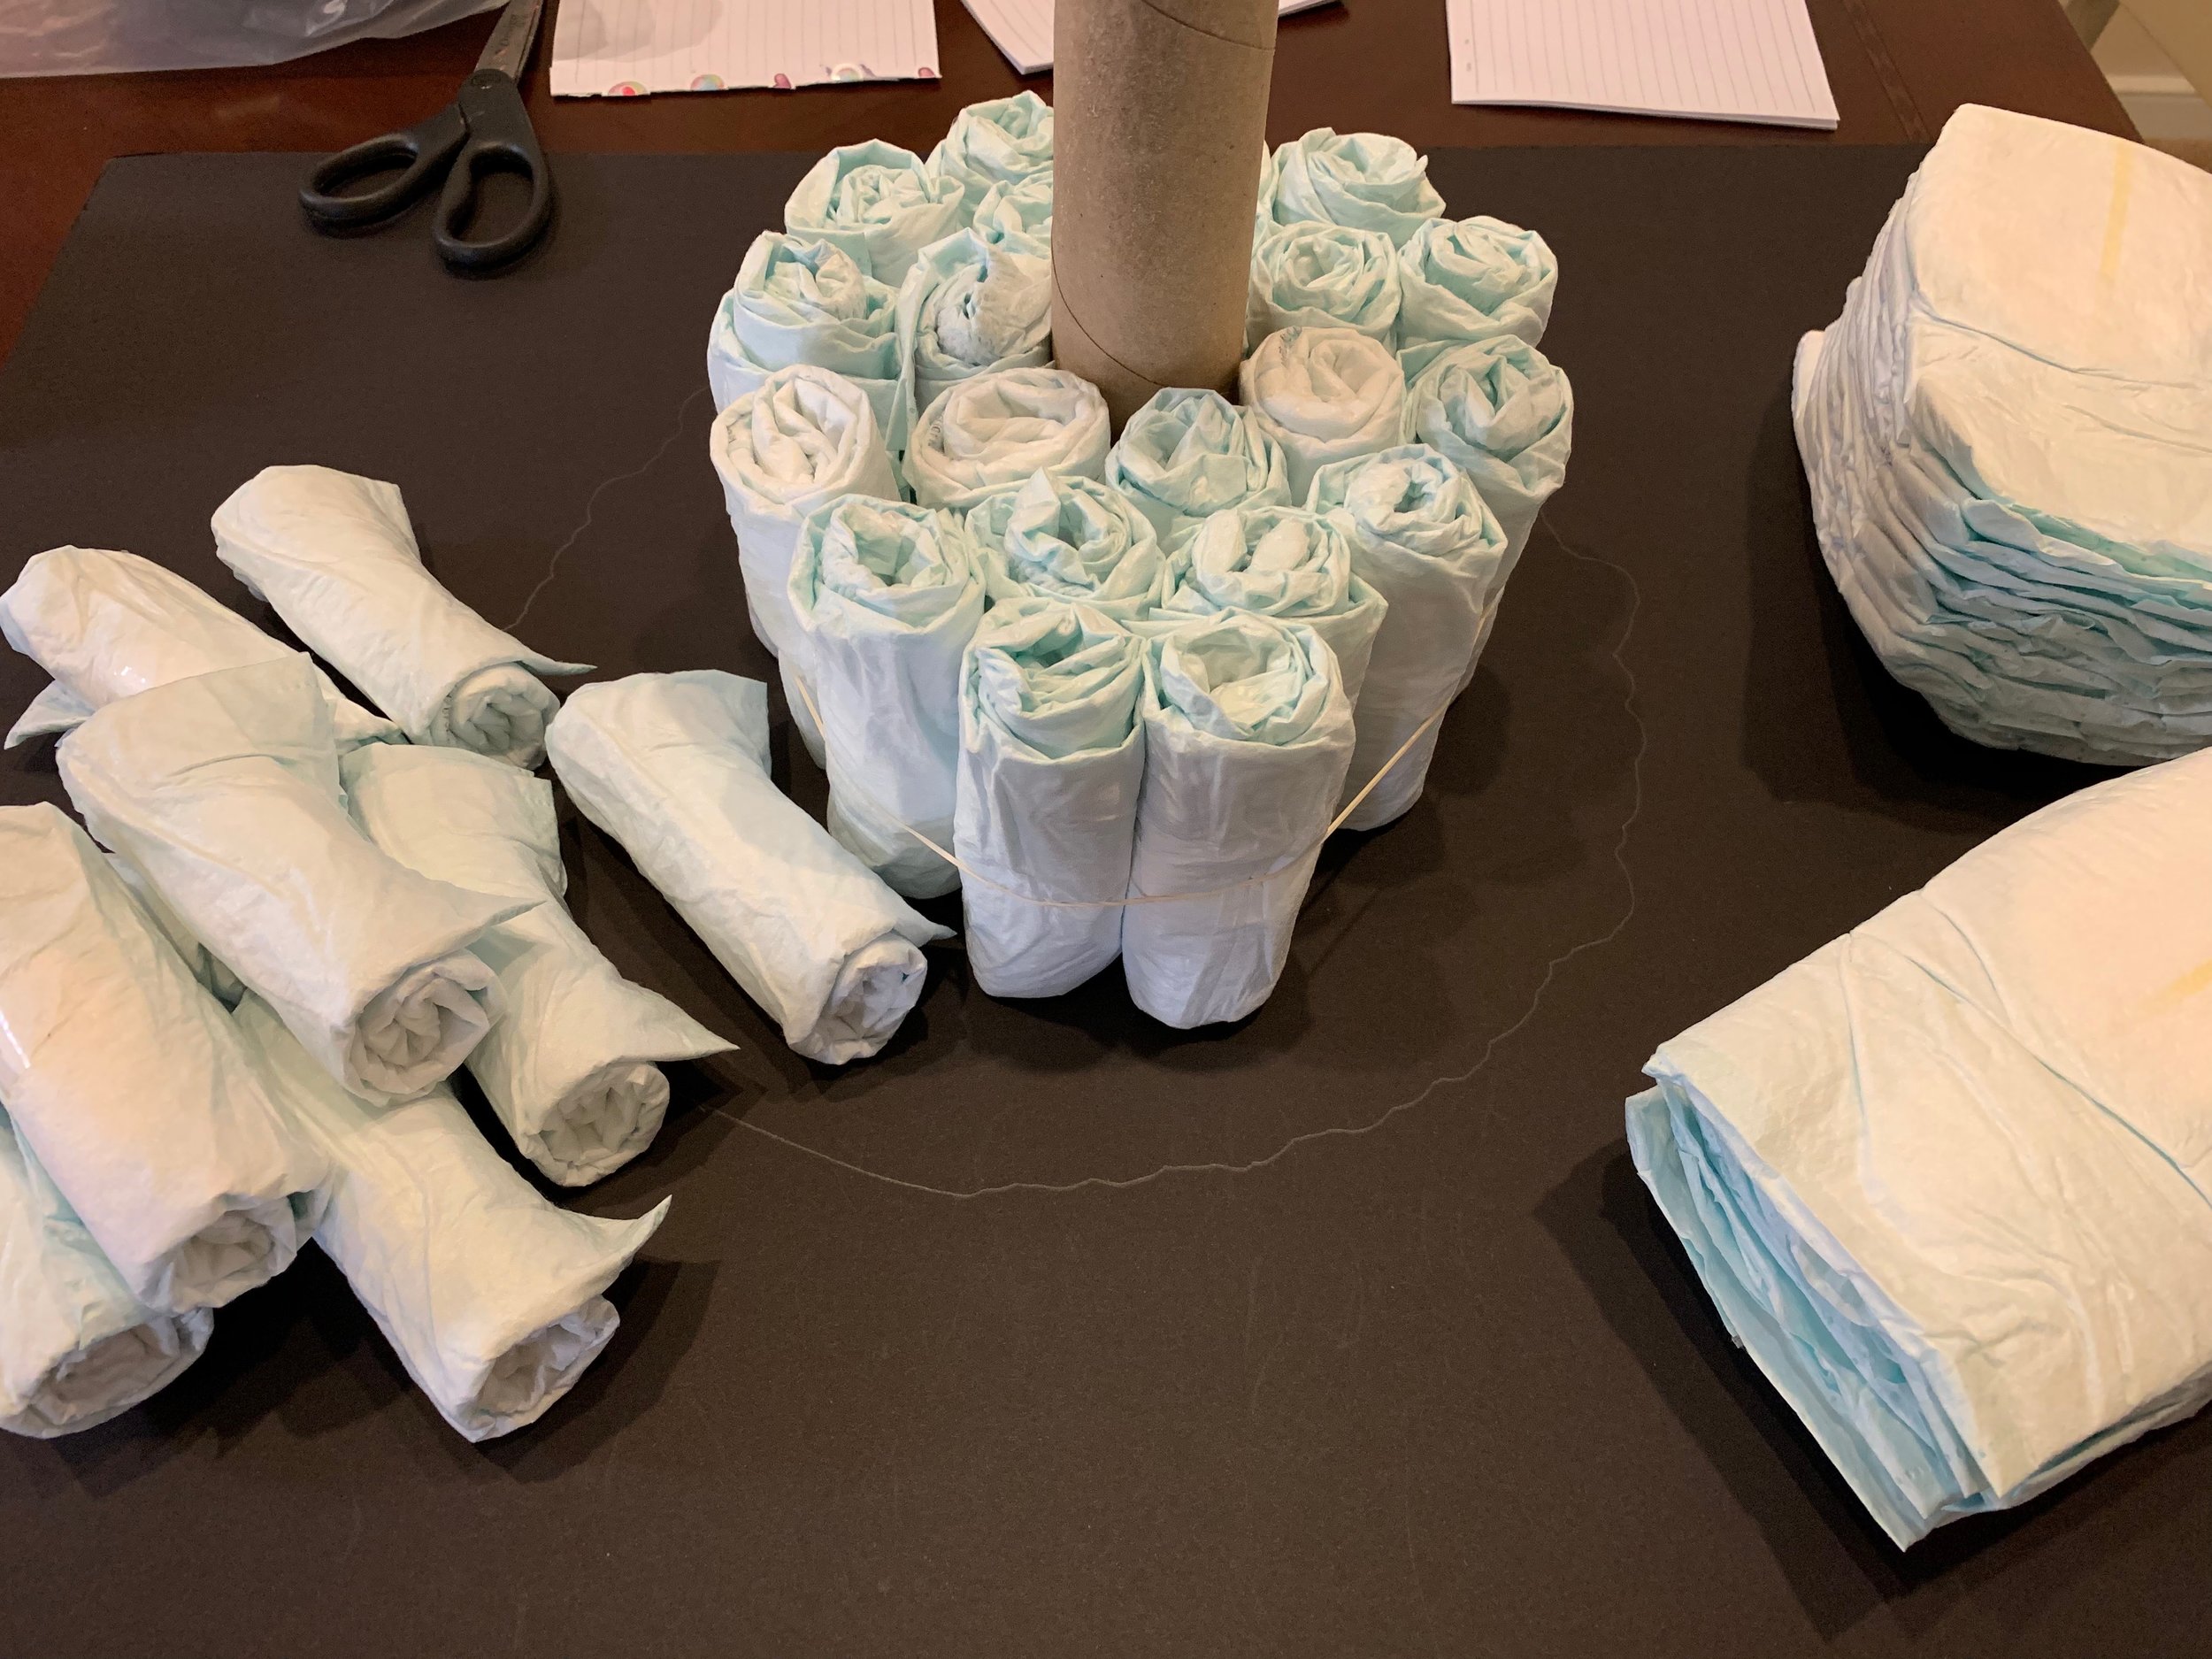
Step Four: Continue rolling and taping the diapers and adding them into the rubber band. Your bottom tier will continue to get full as you do this. I used about 65 diapers on the bottom tier. You can smush them as you see fit to try to keep the circle as “even” as possible.

Step five: Once your bottom tier is to your liking, add another rubber band for the second tier. Again you’ll need about 6 to 7 diapers for the inner layer, closest to the paper towel roll. Repeat step four. I used about 36 diapers on this tier.
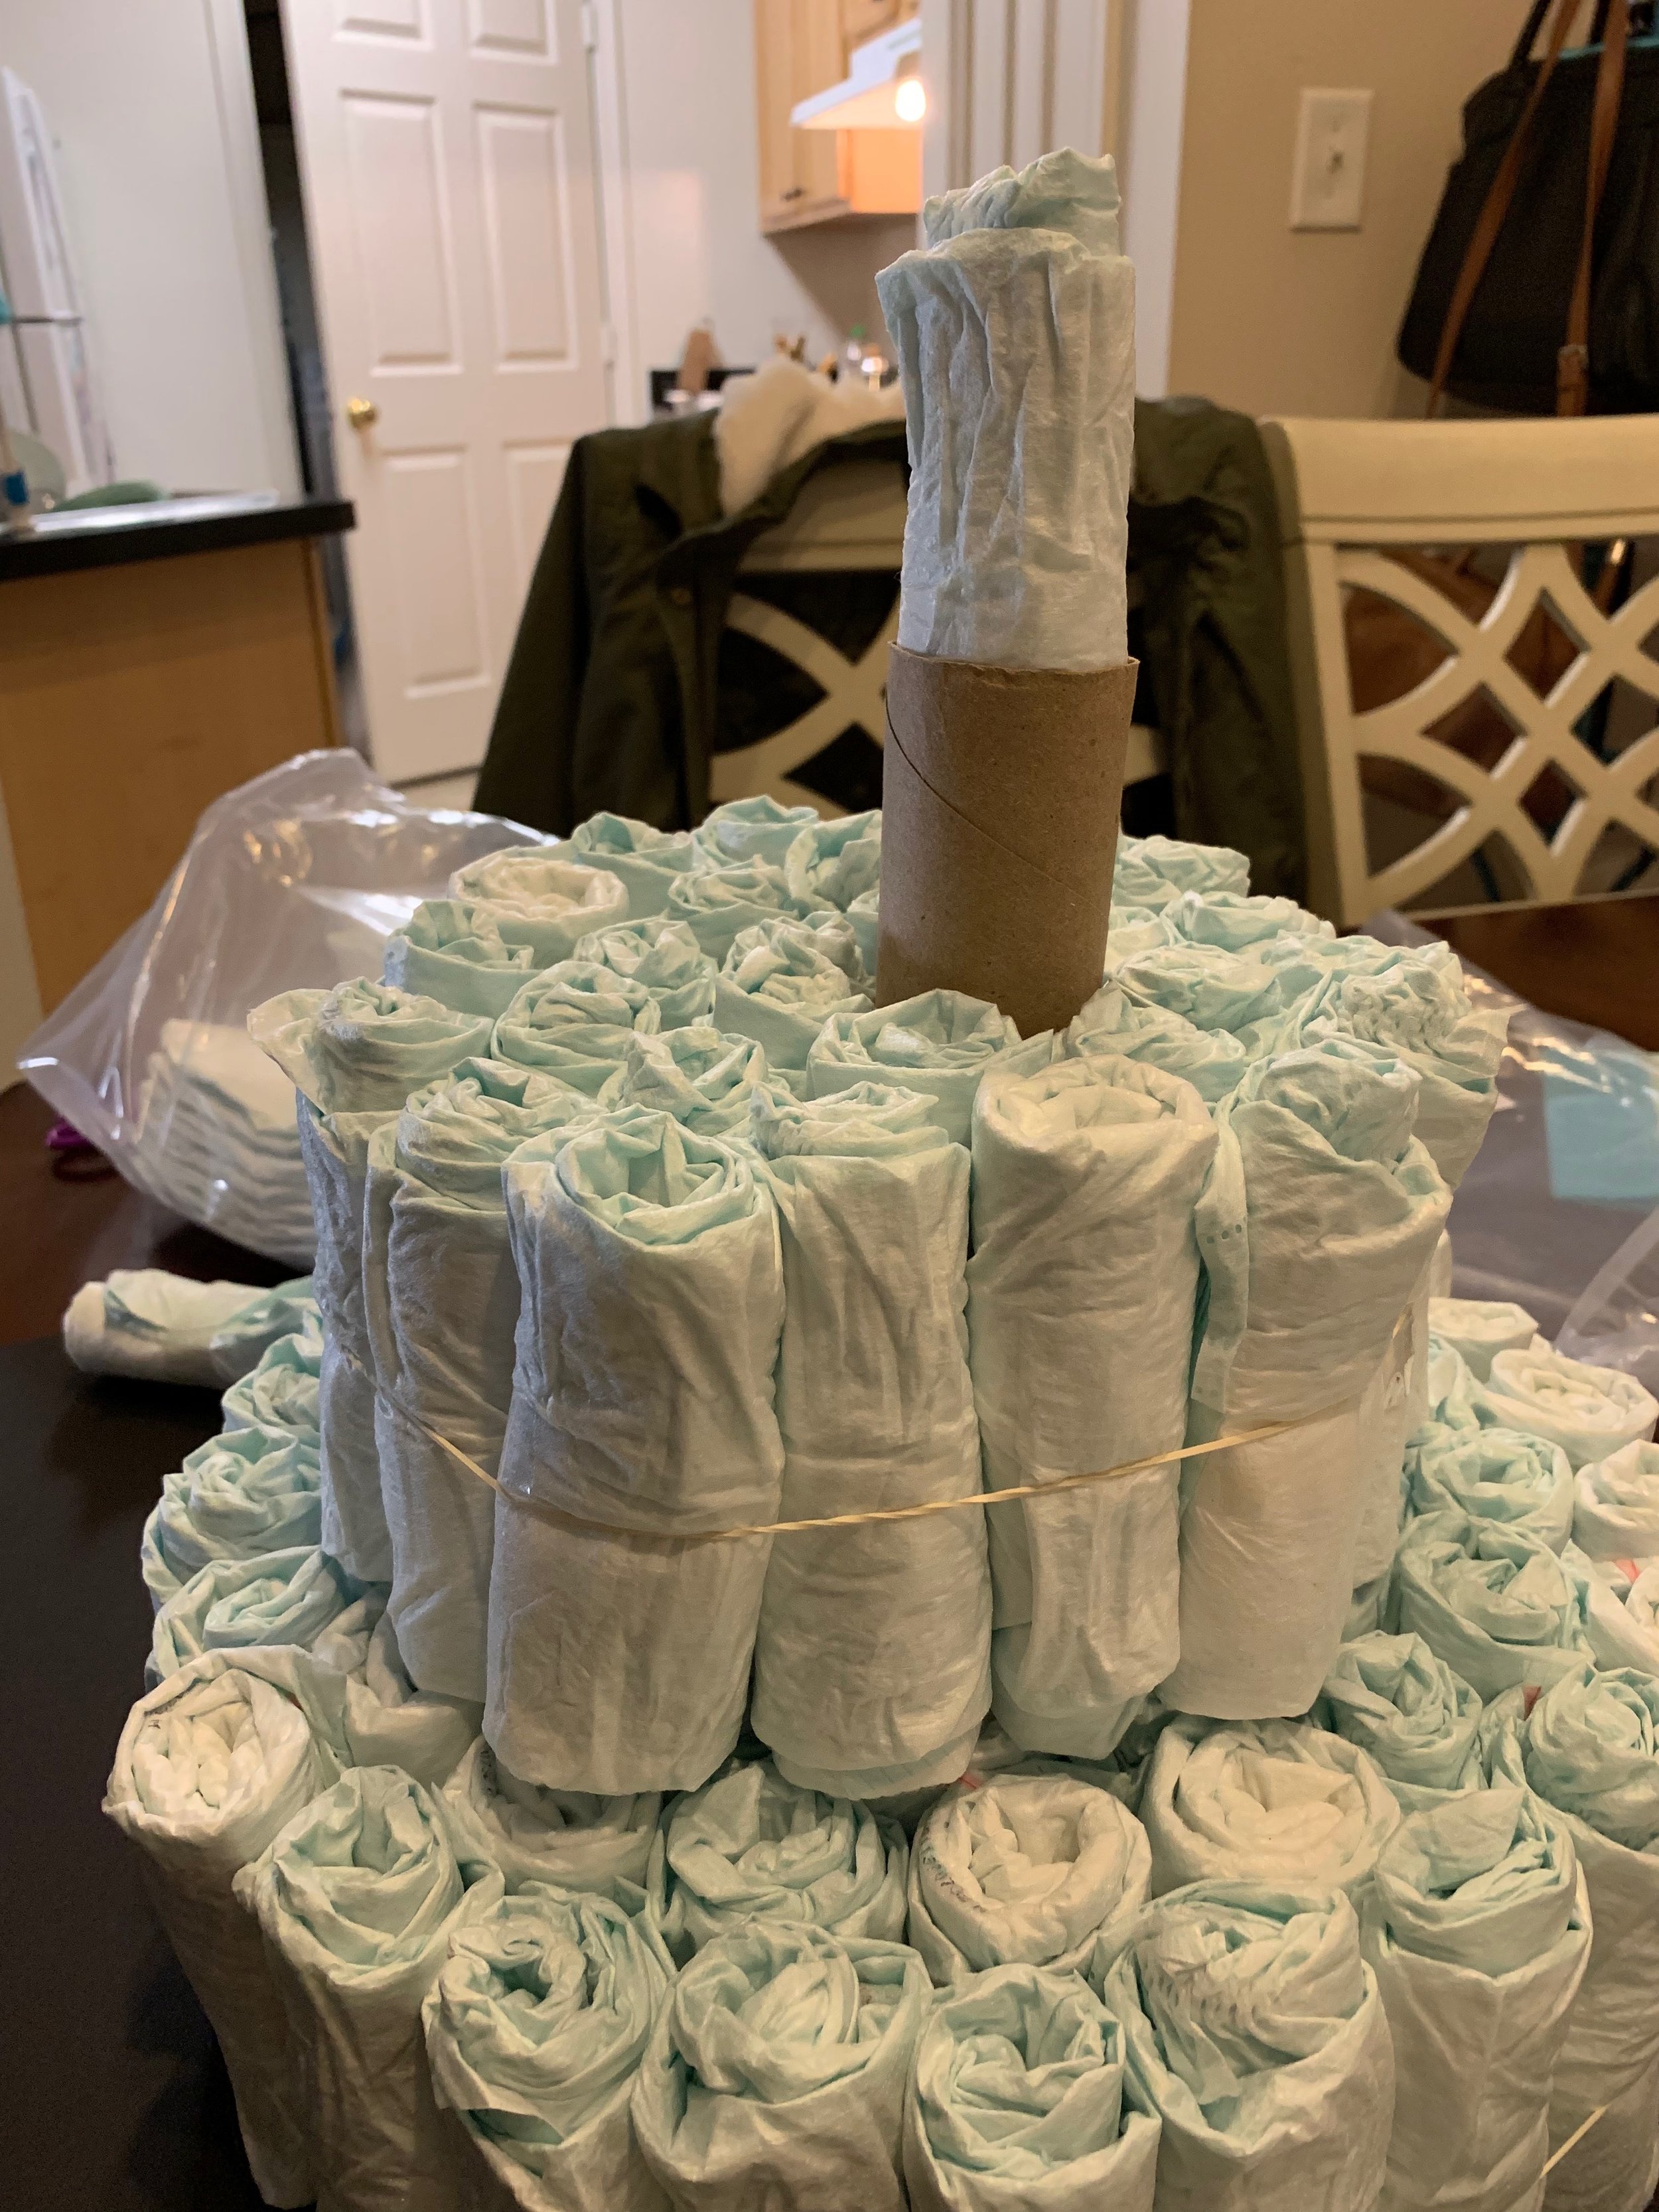
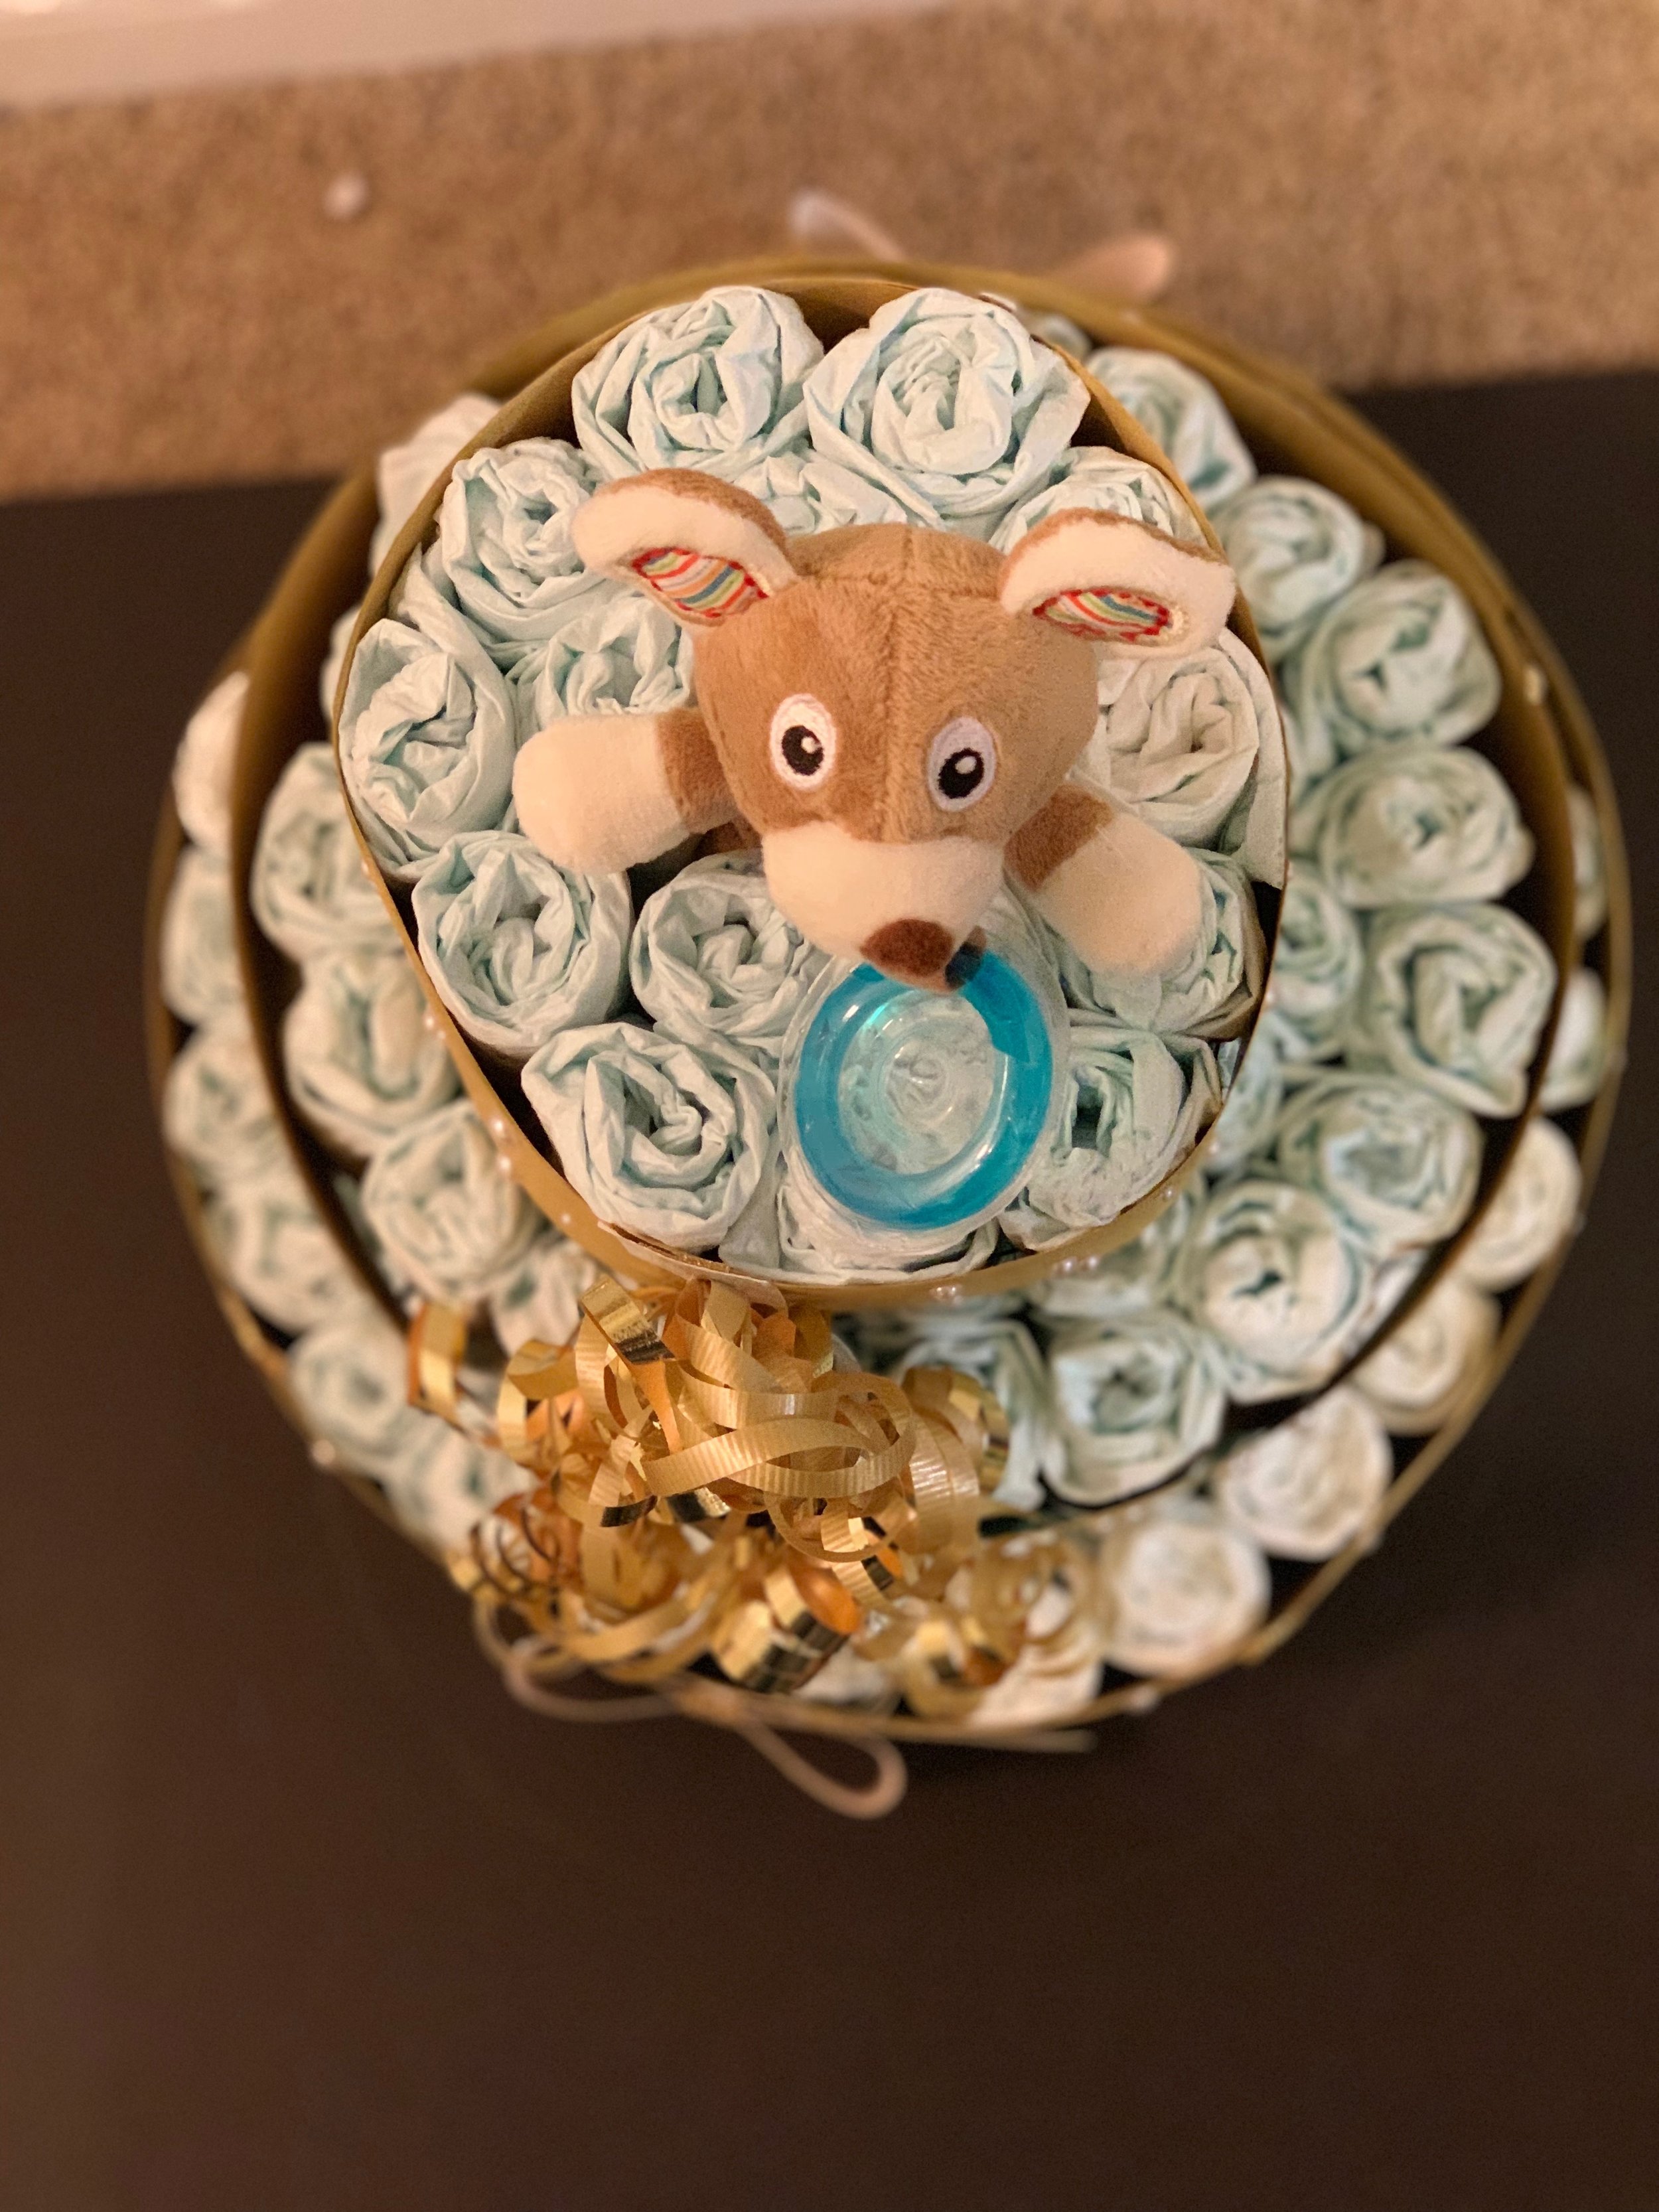
Step Six: Roll one diaper and insert into the top of the empty paper towel roll. This will help with the top tier. Add another rubber band. For the inner layer, you will need 5 to 6 rolled diapers. Repeat step four again. I used 18 diapers on this tier.
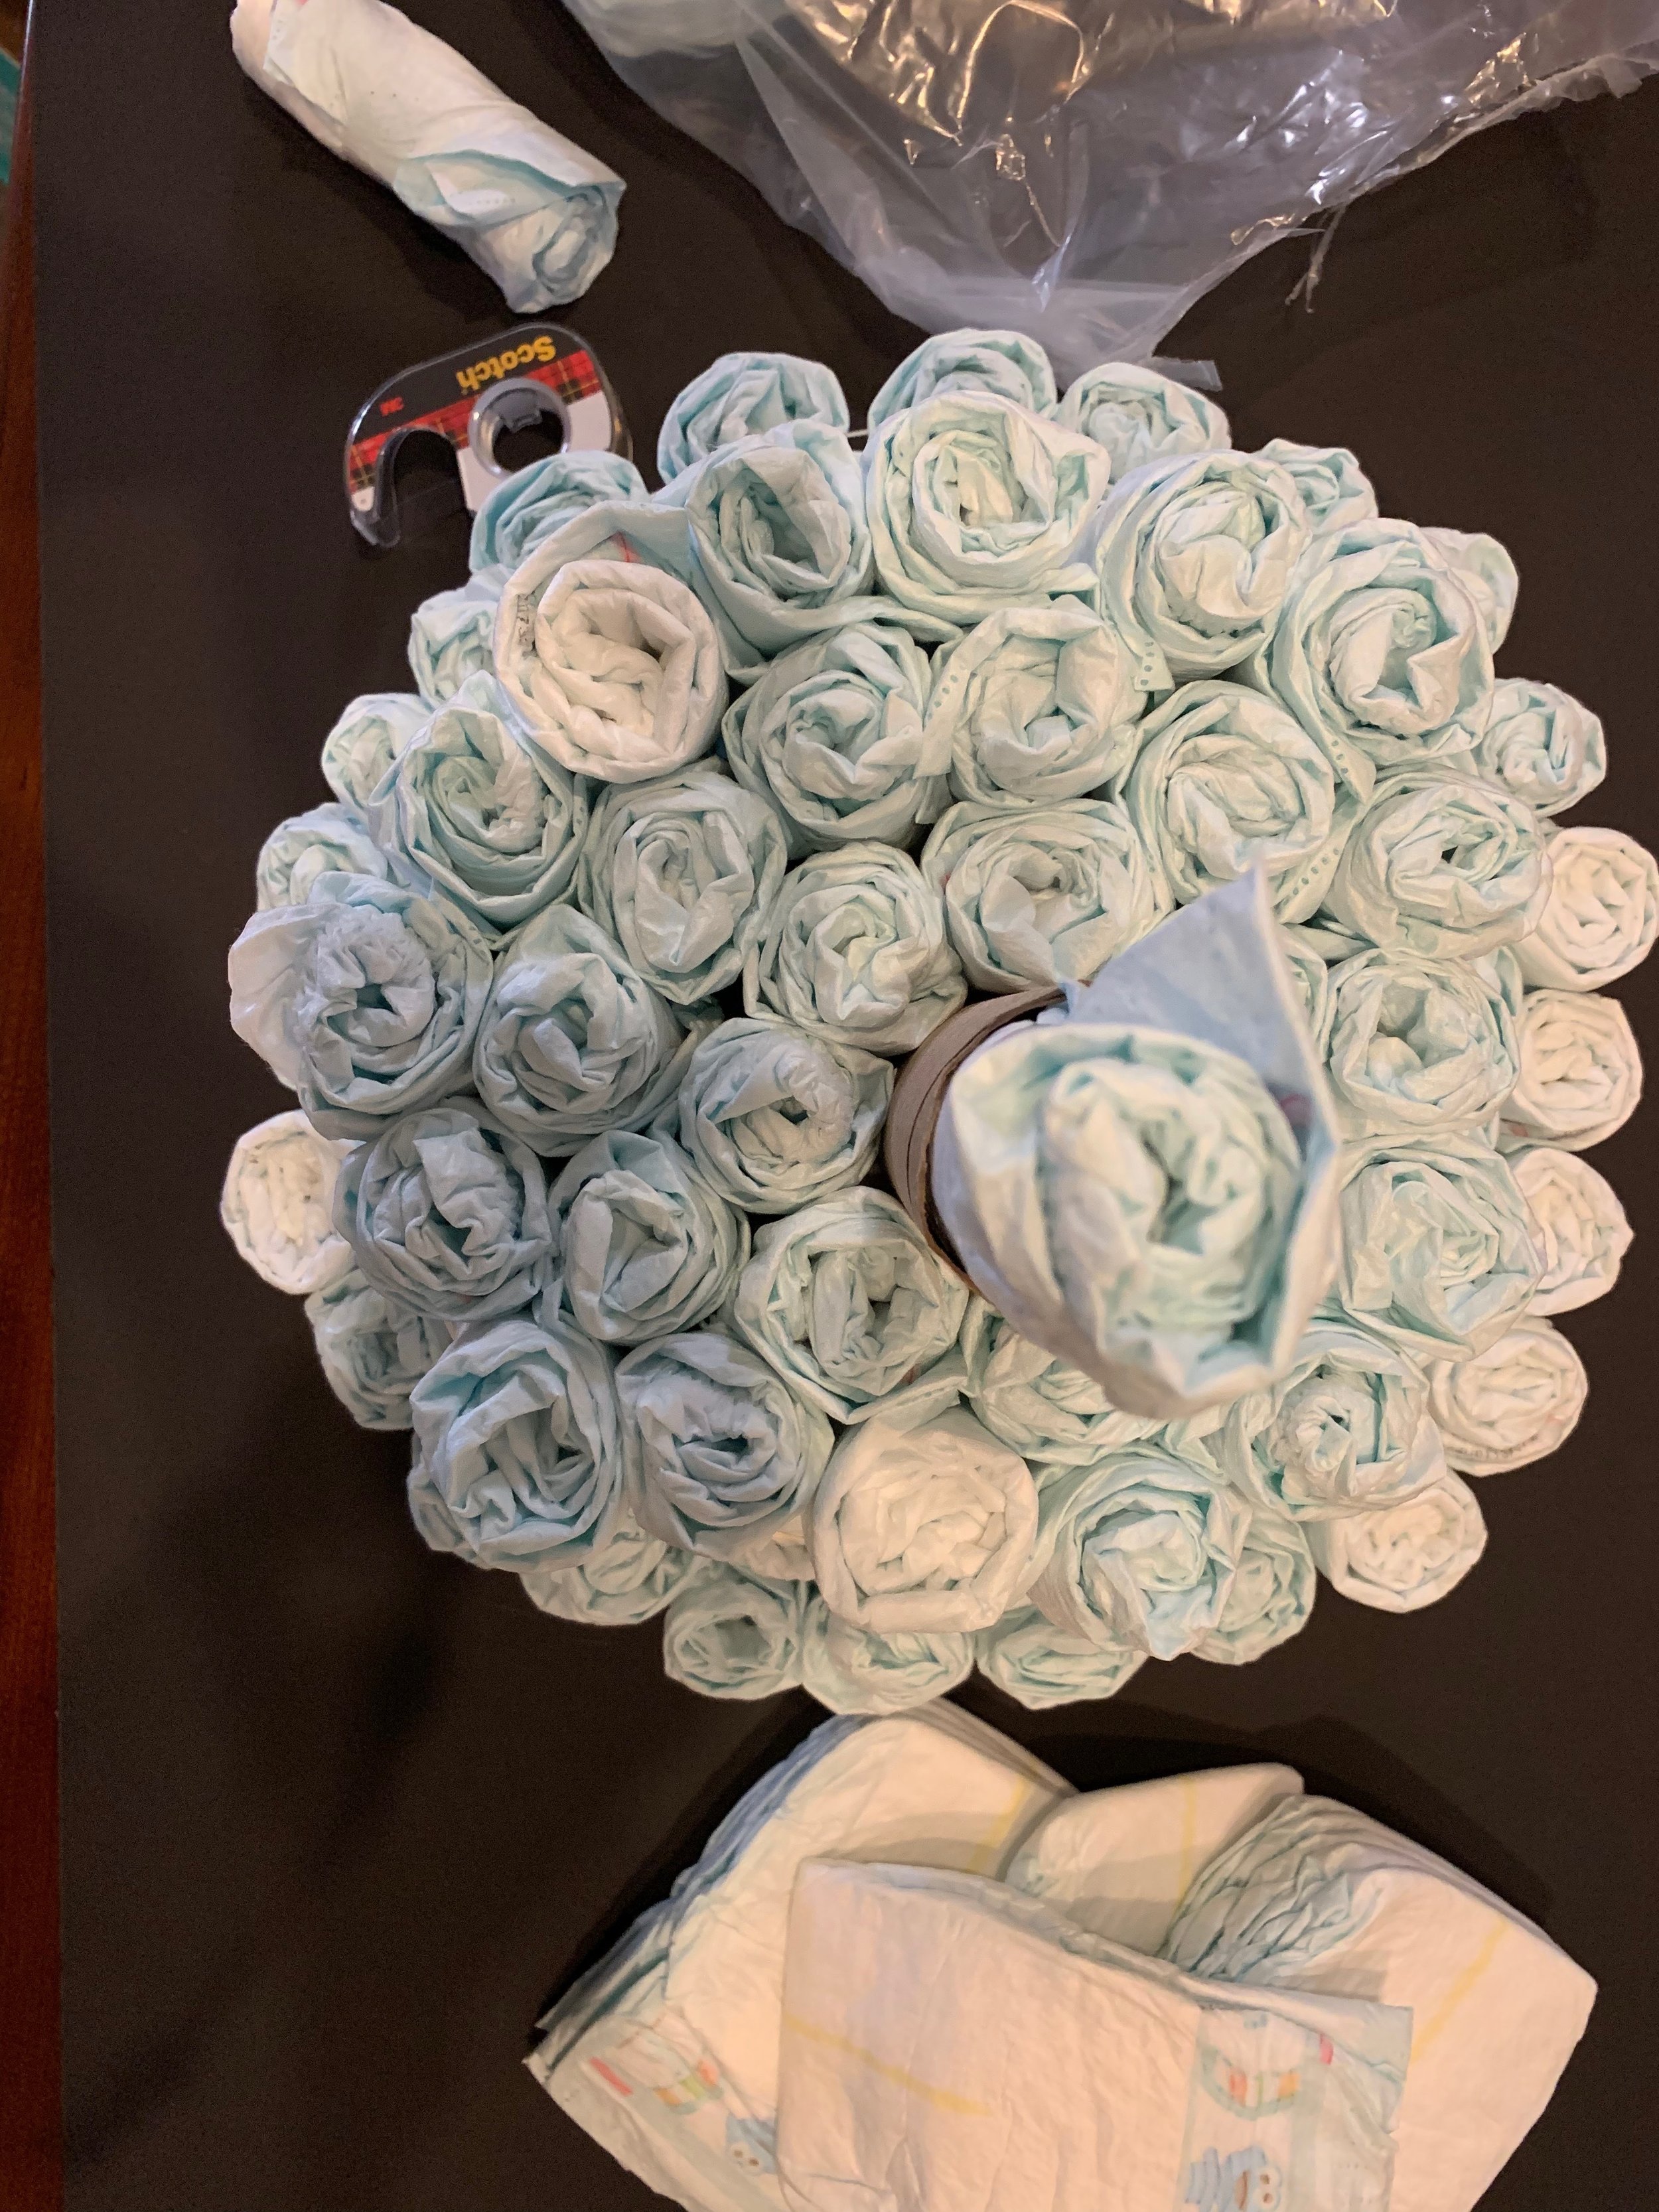
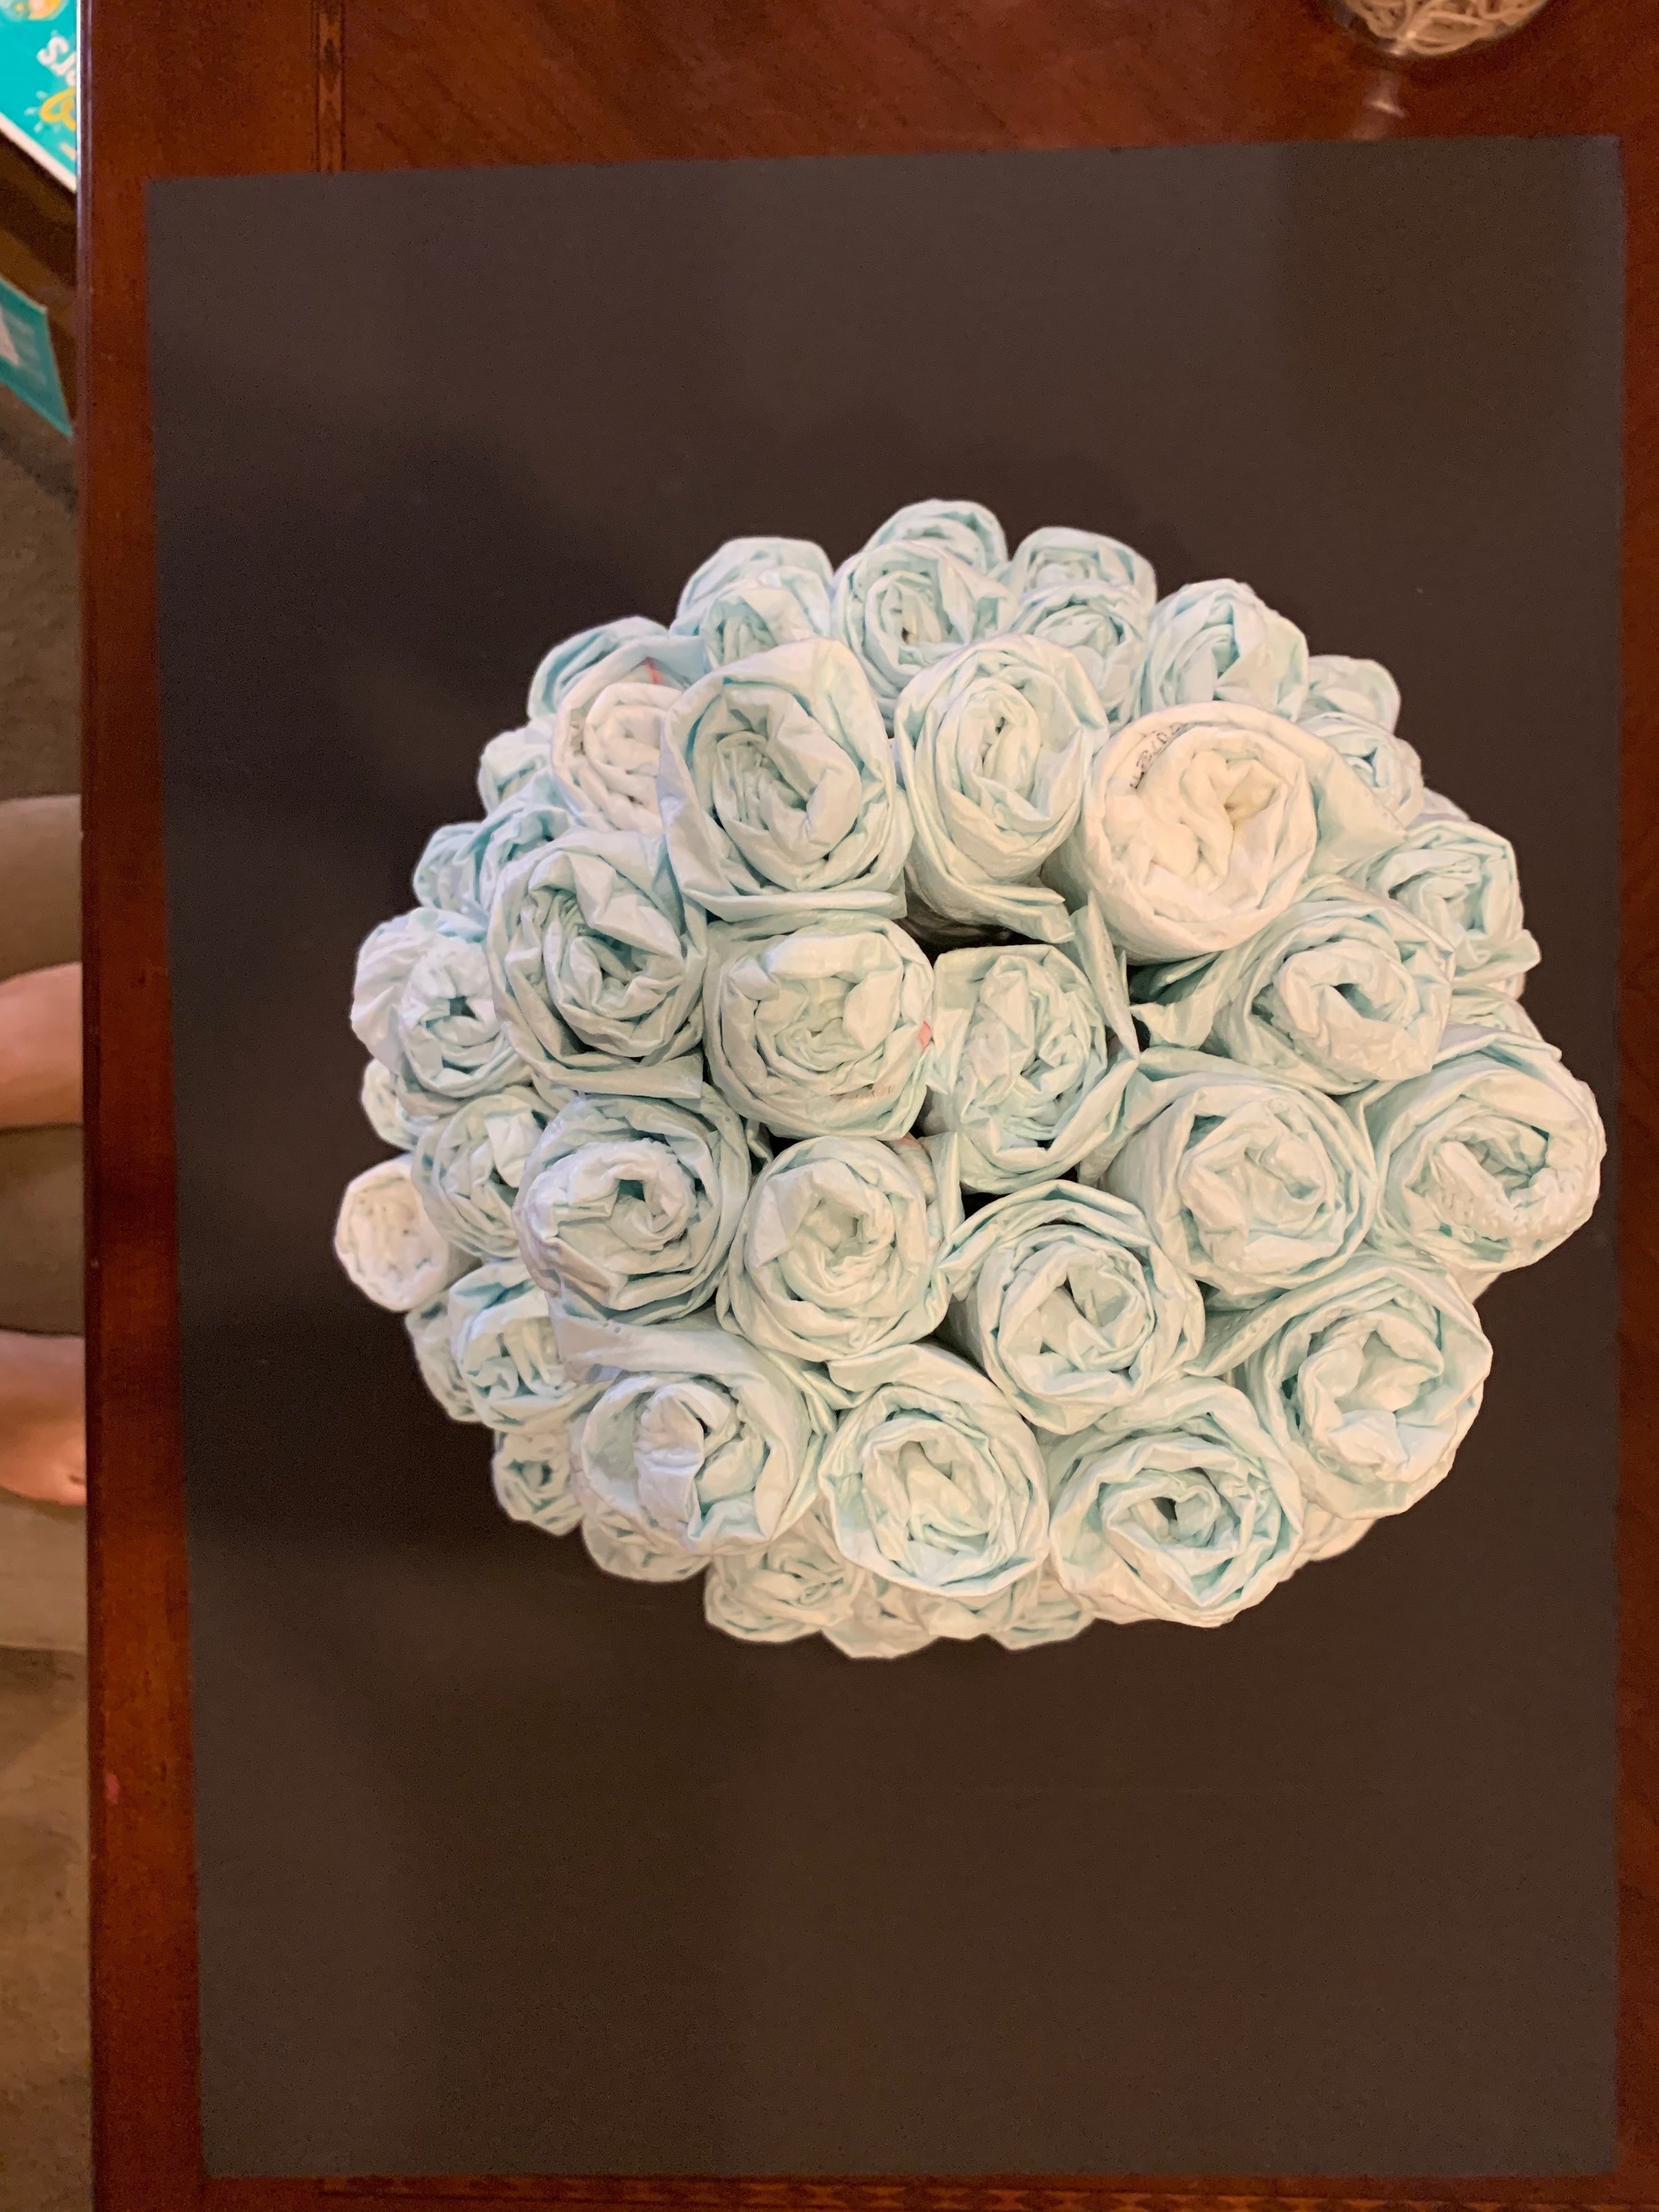
I had to smush and maneuver as needed to get a round, full, and even looking cake.
Now to the decorating!
This is where you get creative as your little heart desires!
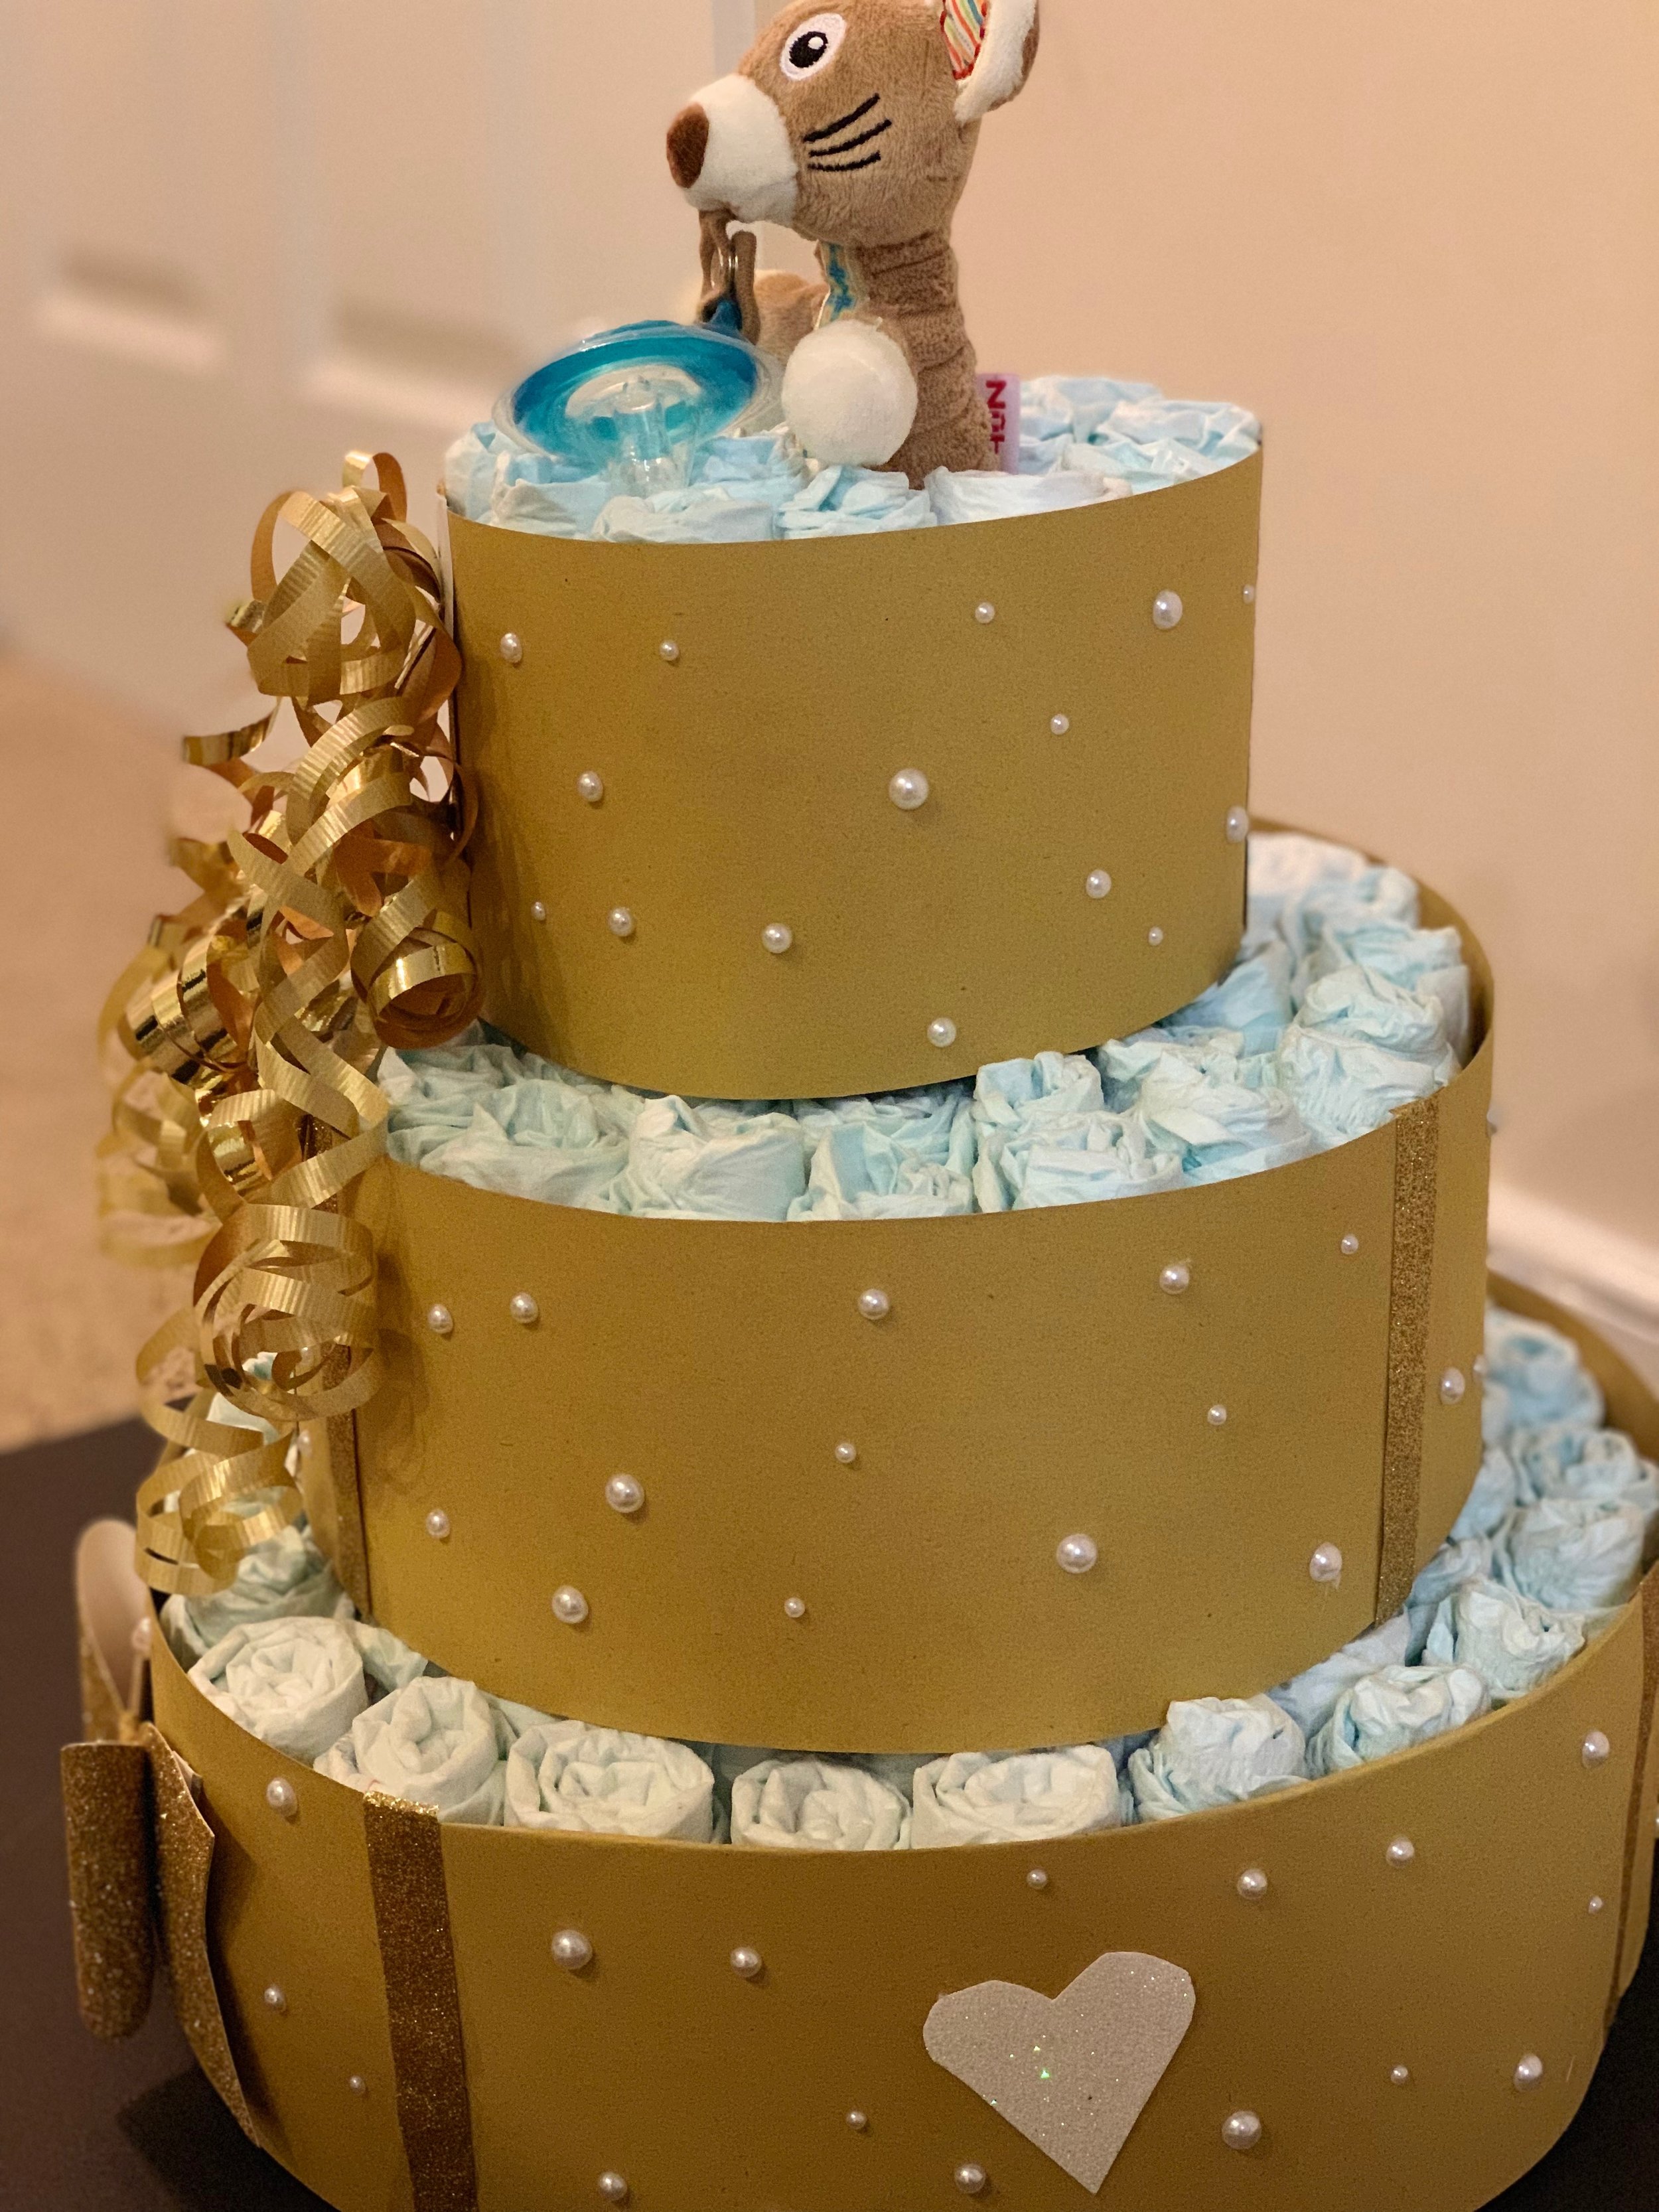
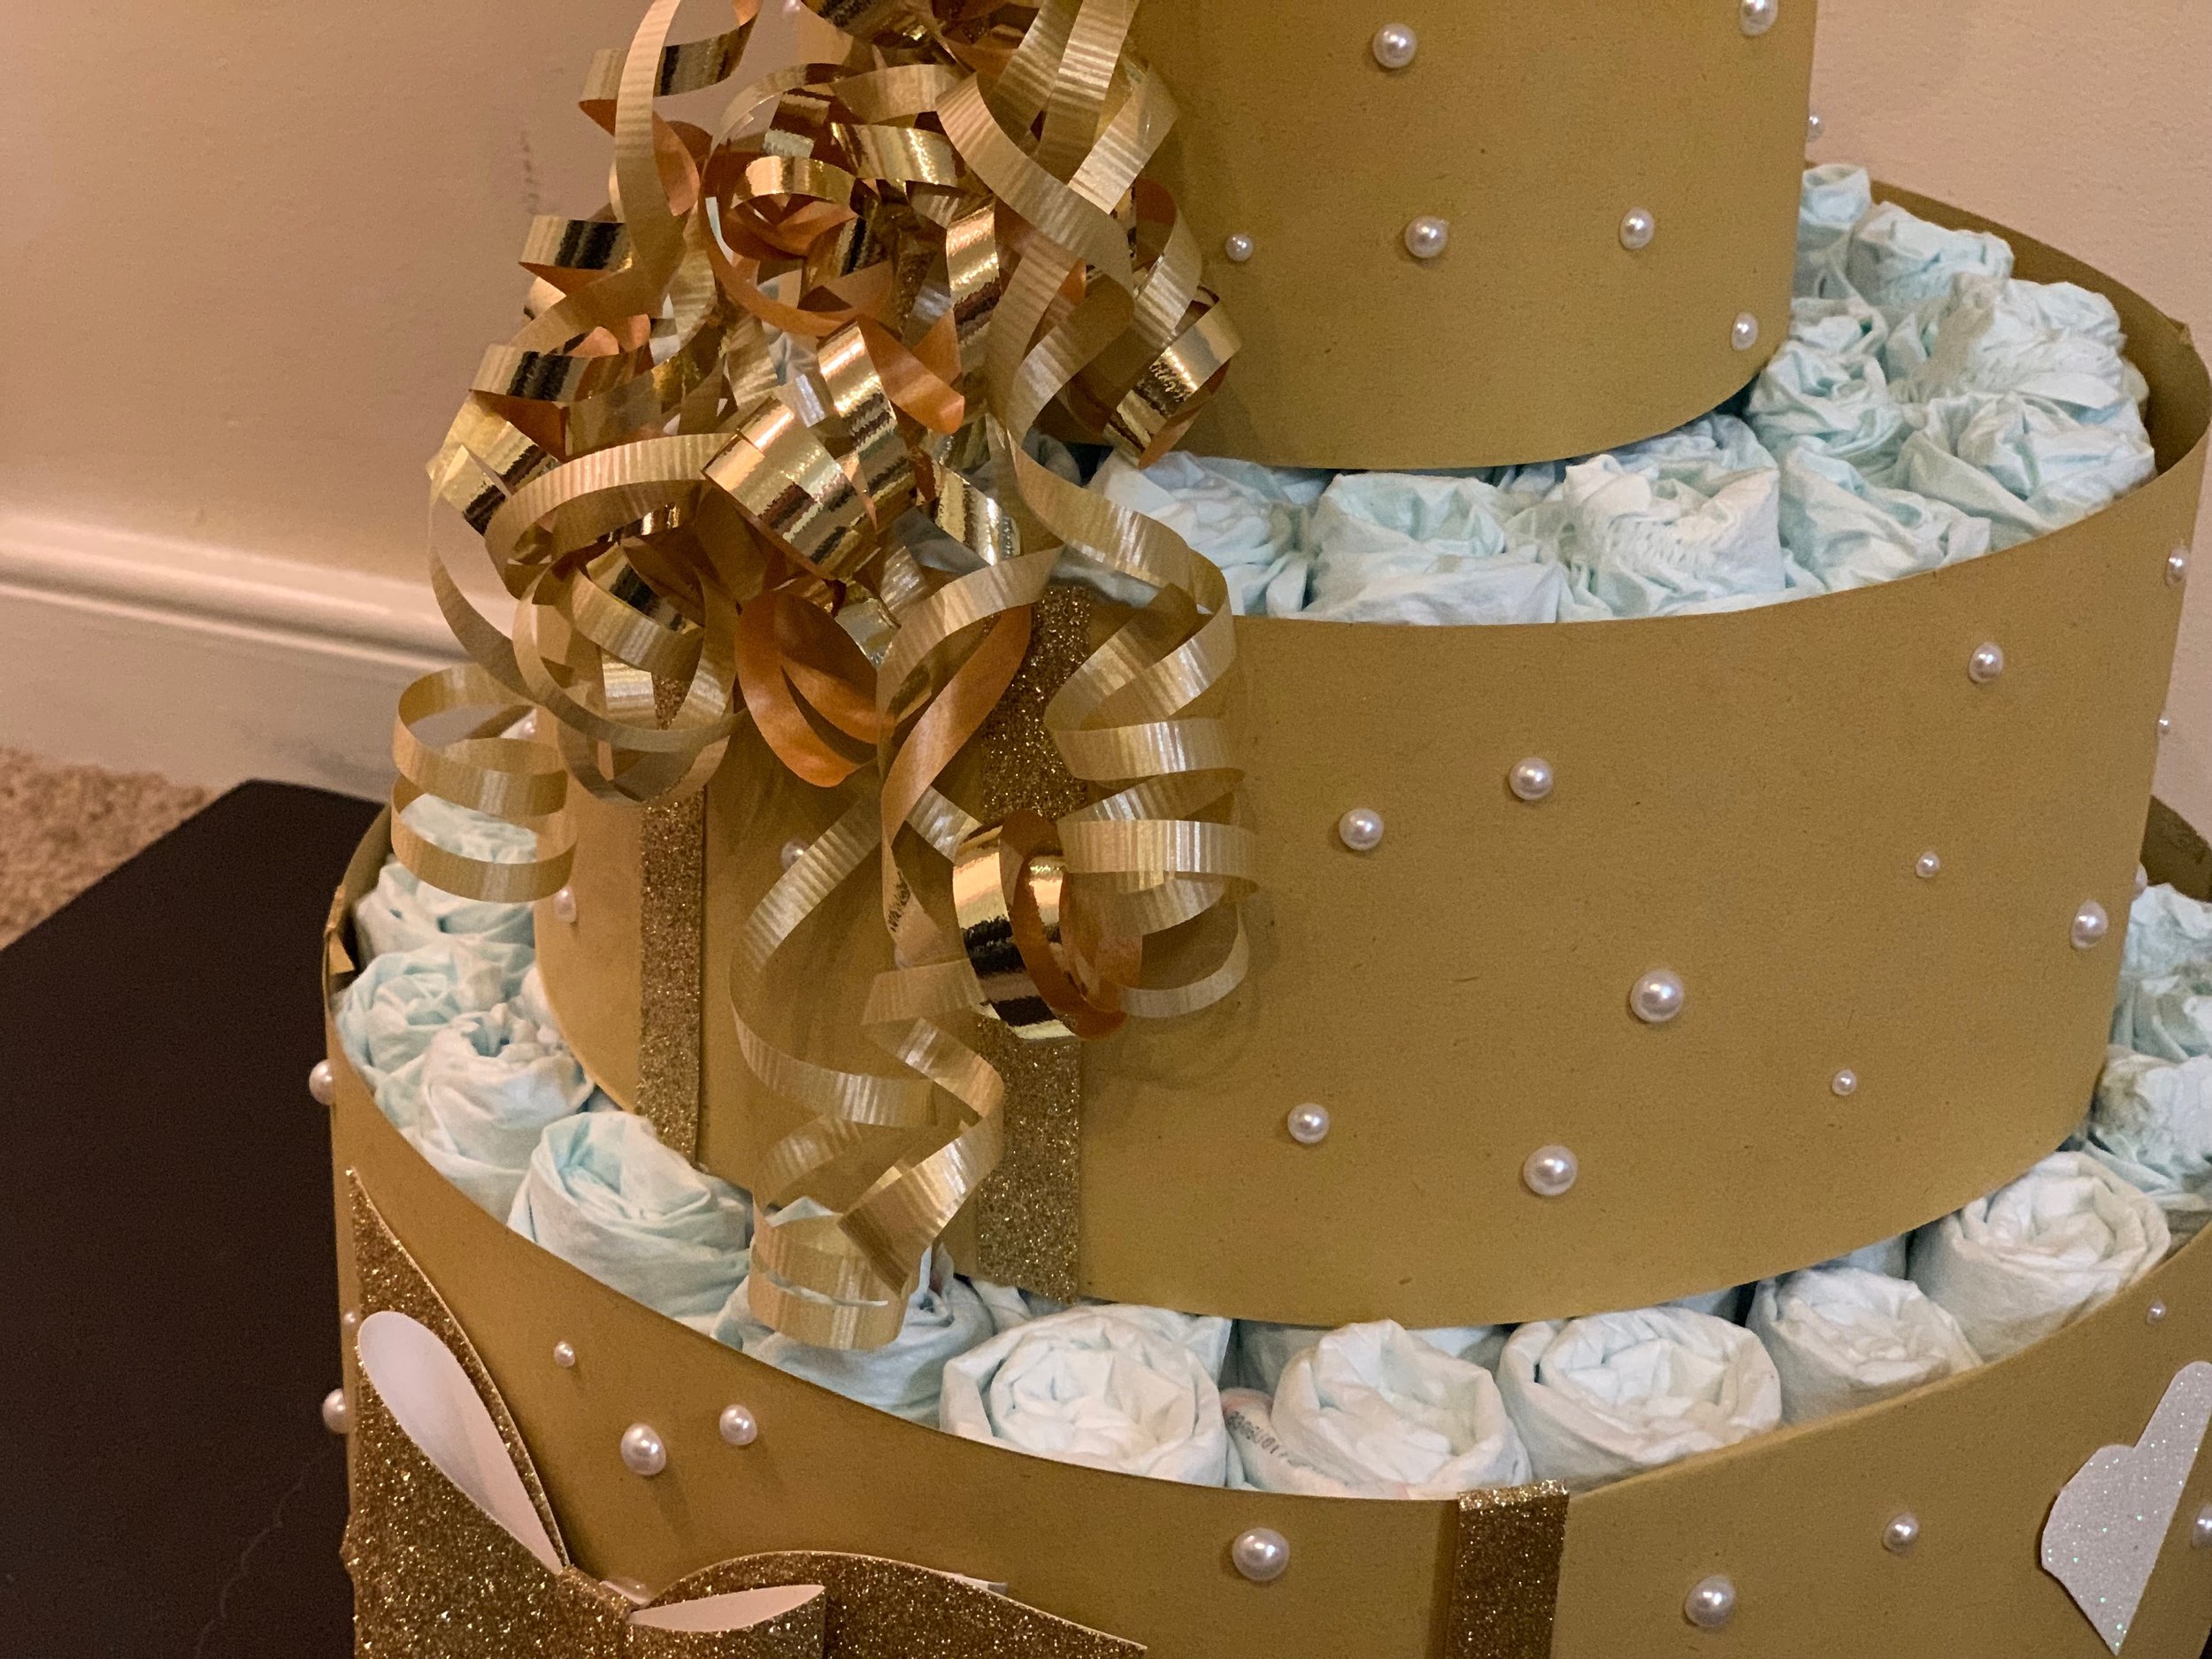
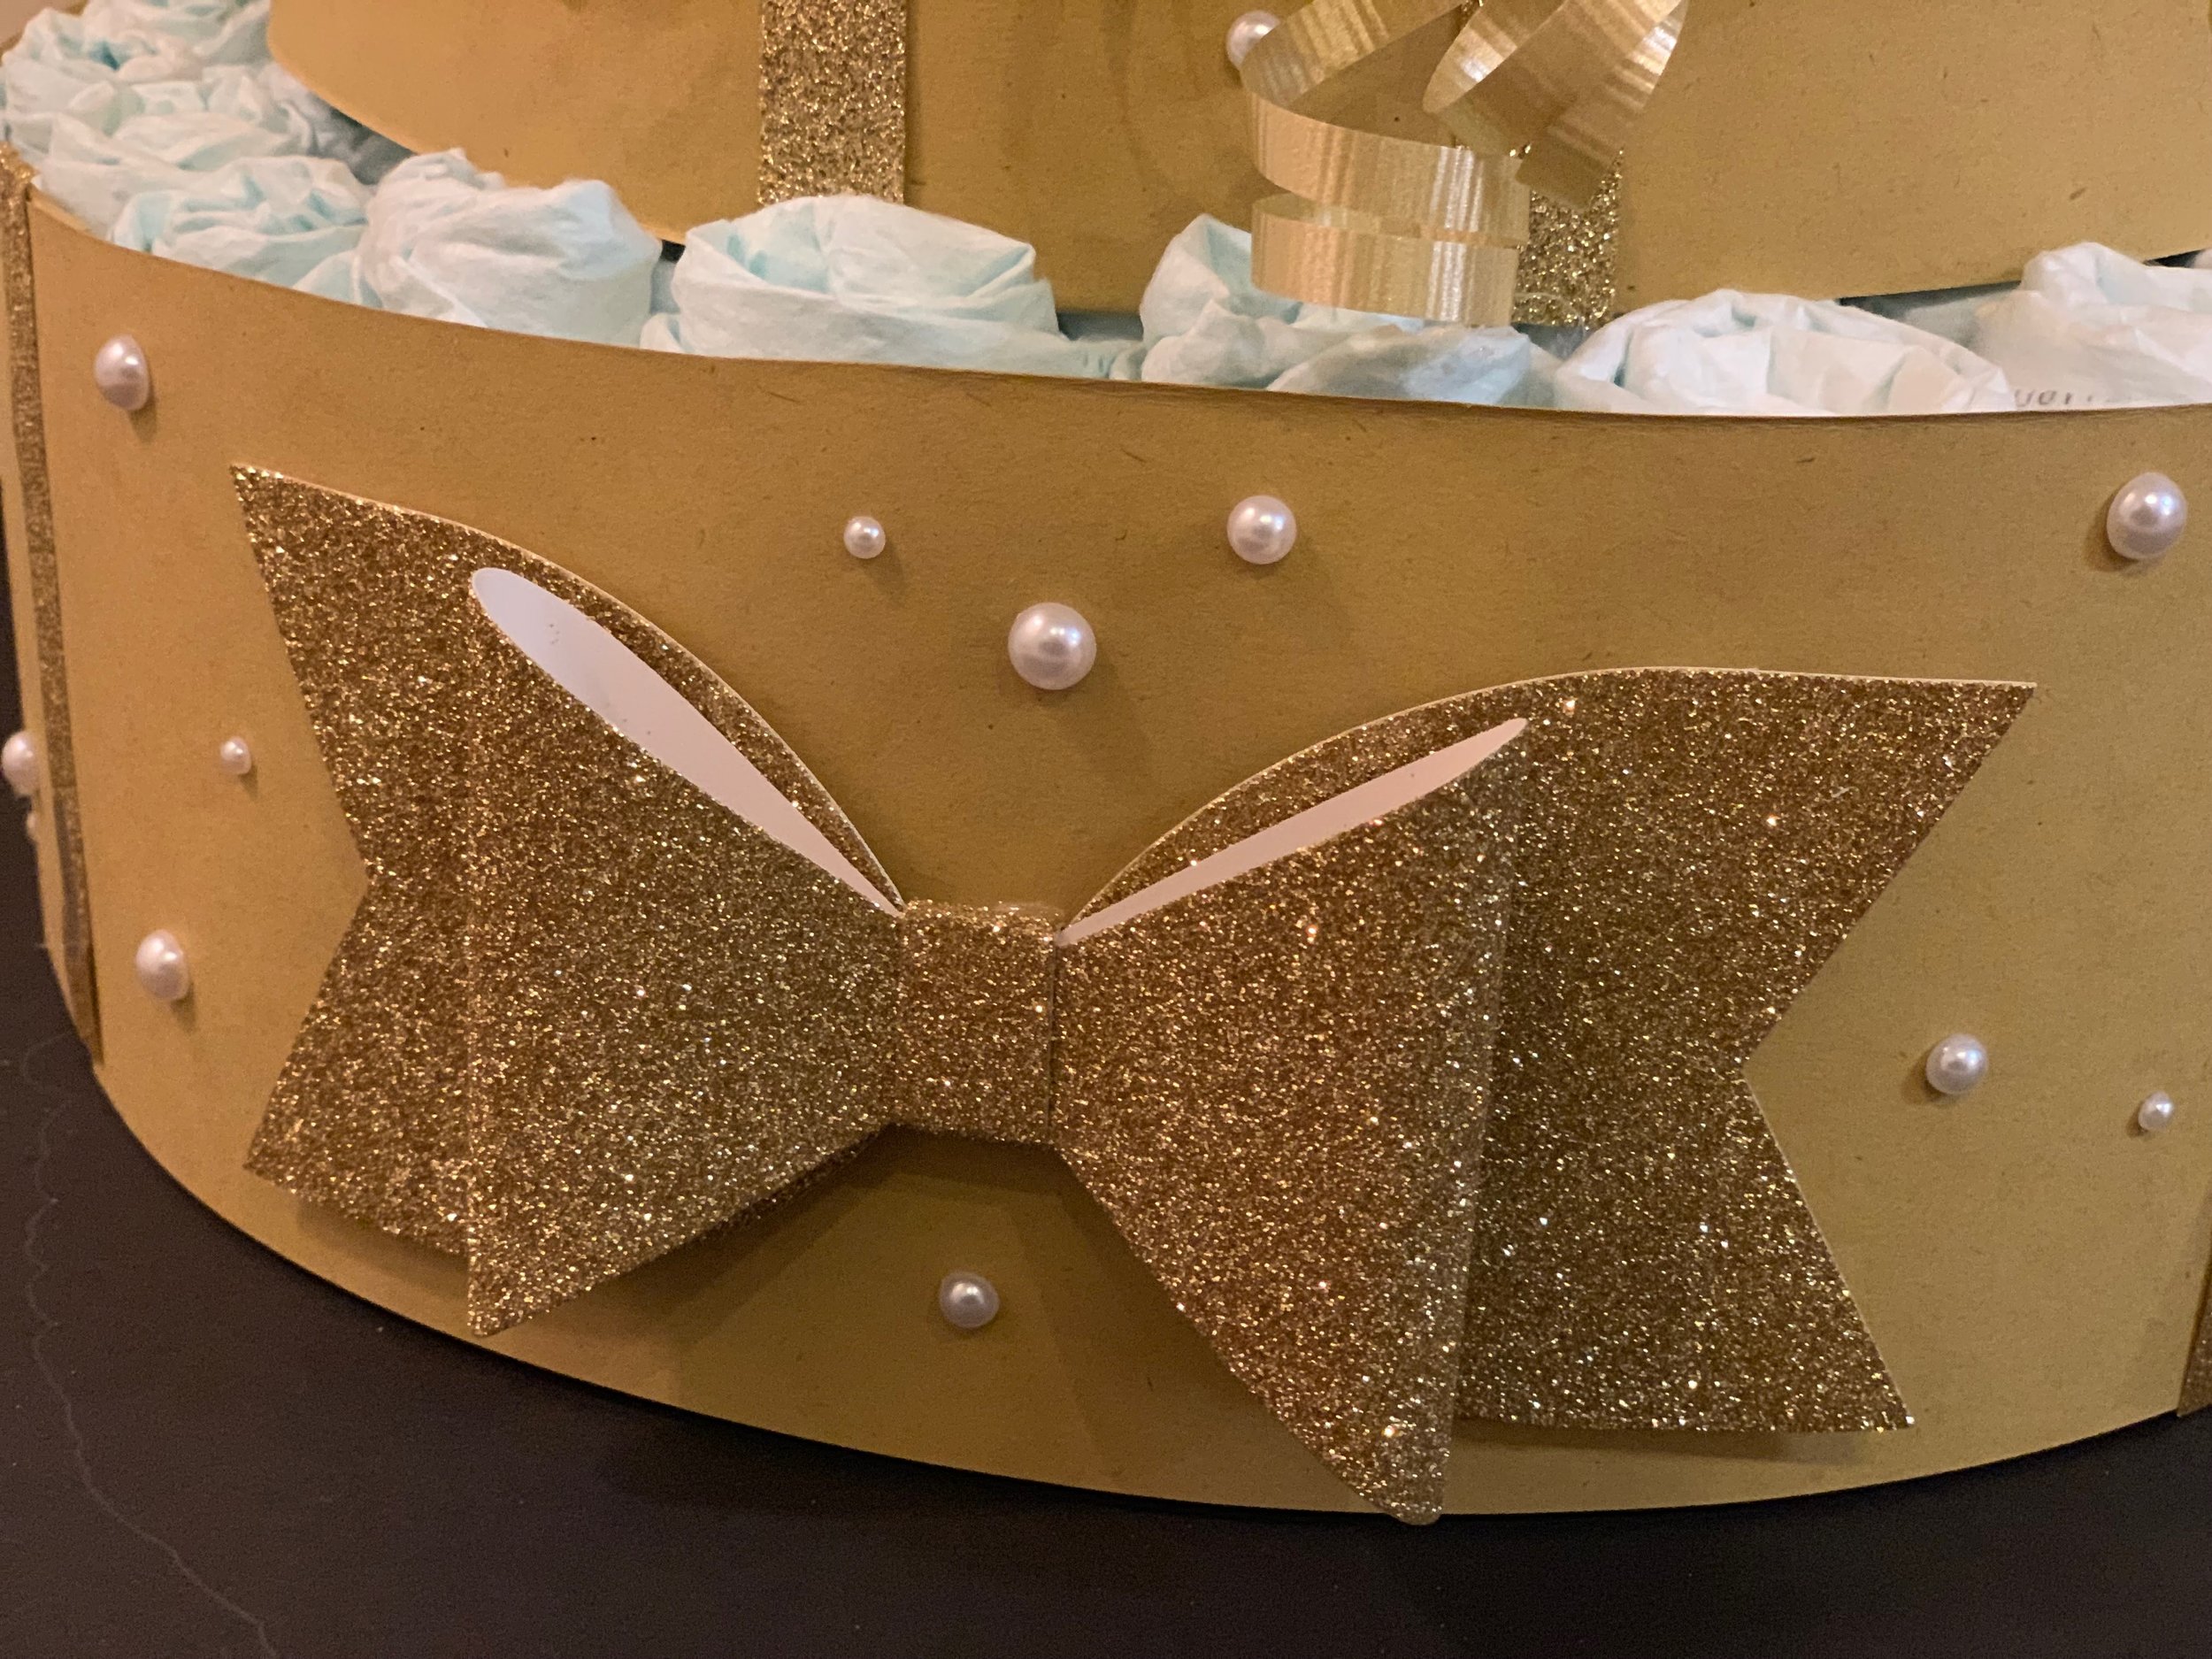
For the base of the decorations and to hide the diapers, I used gold card stock. I took a piece of card stock, folded it in half vertical wise or hot dog style as the elementary teachers say, and then cut in half. I took 4 half pieces for the bottom tier, hot glued the edges to glue them into one long piece, then wrapped them around the bottom tier, hot gluing the ends to close it off. The second tier needed about 3 and the top about 2 and a couple inches. I originally tried taping the edges and it did not hold whatsoever!
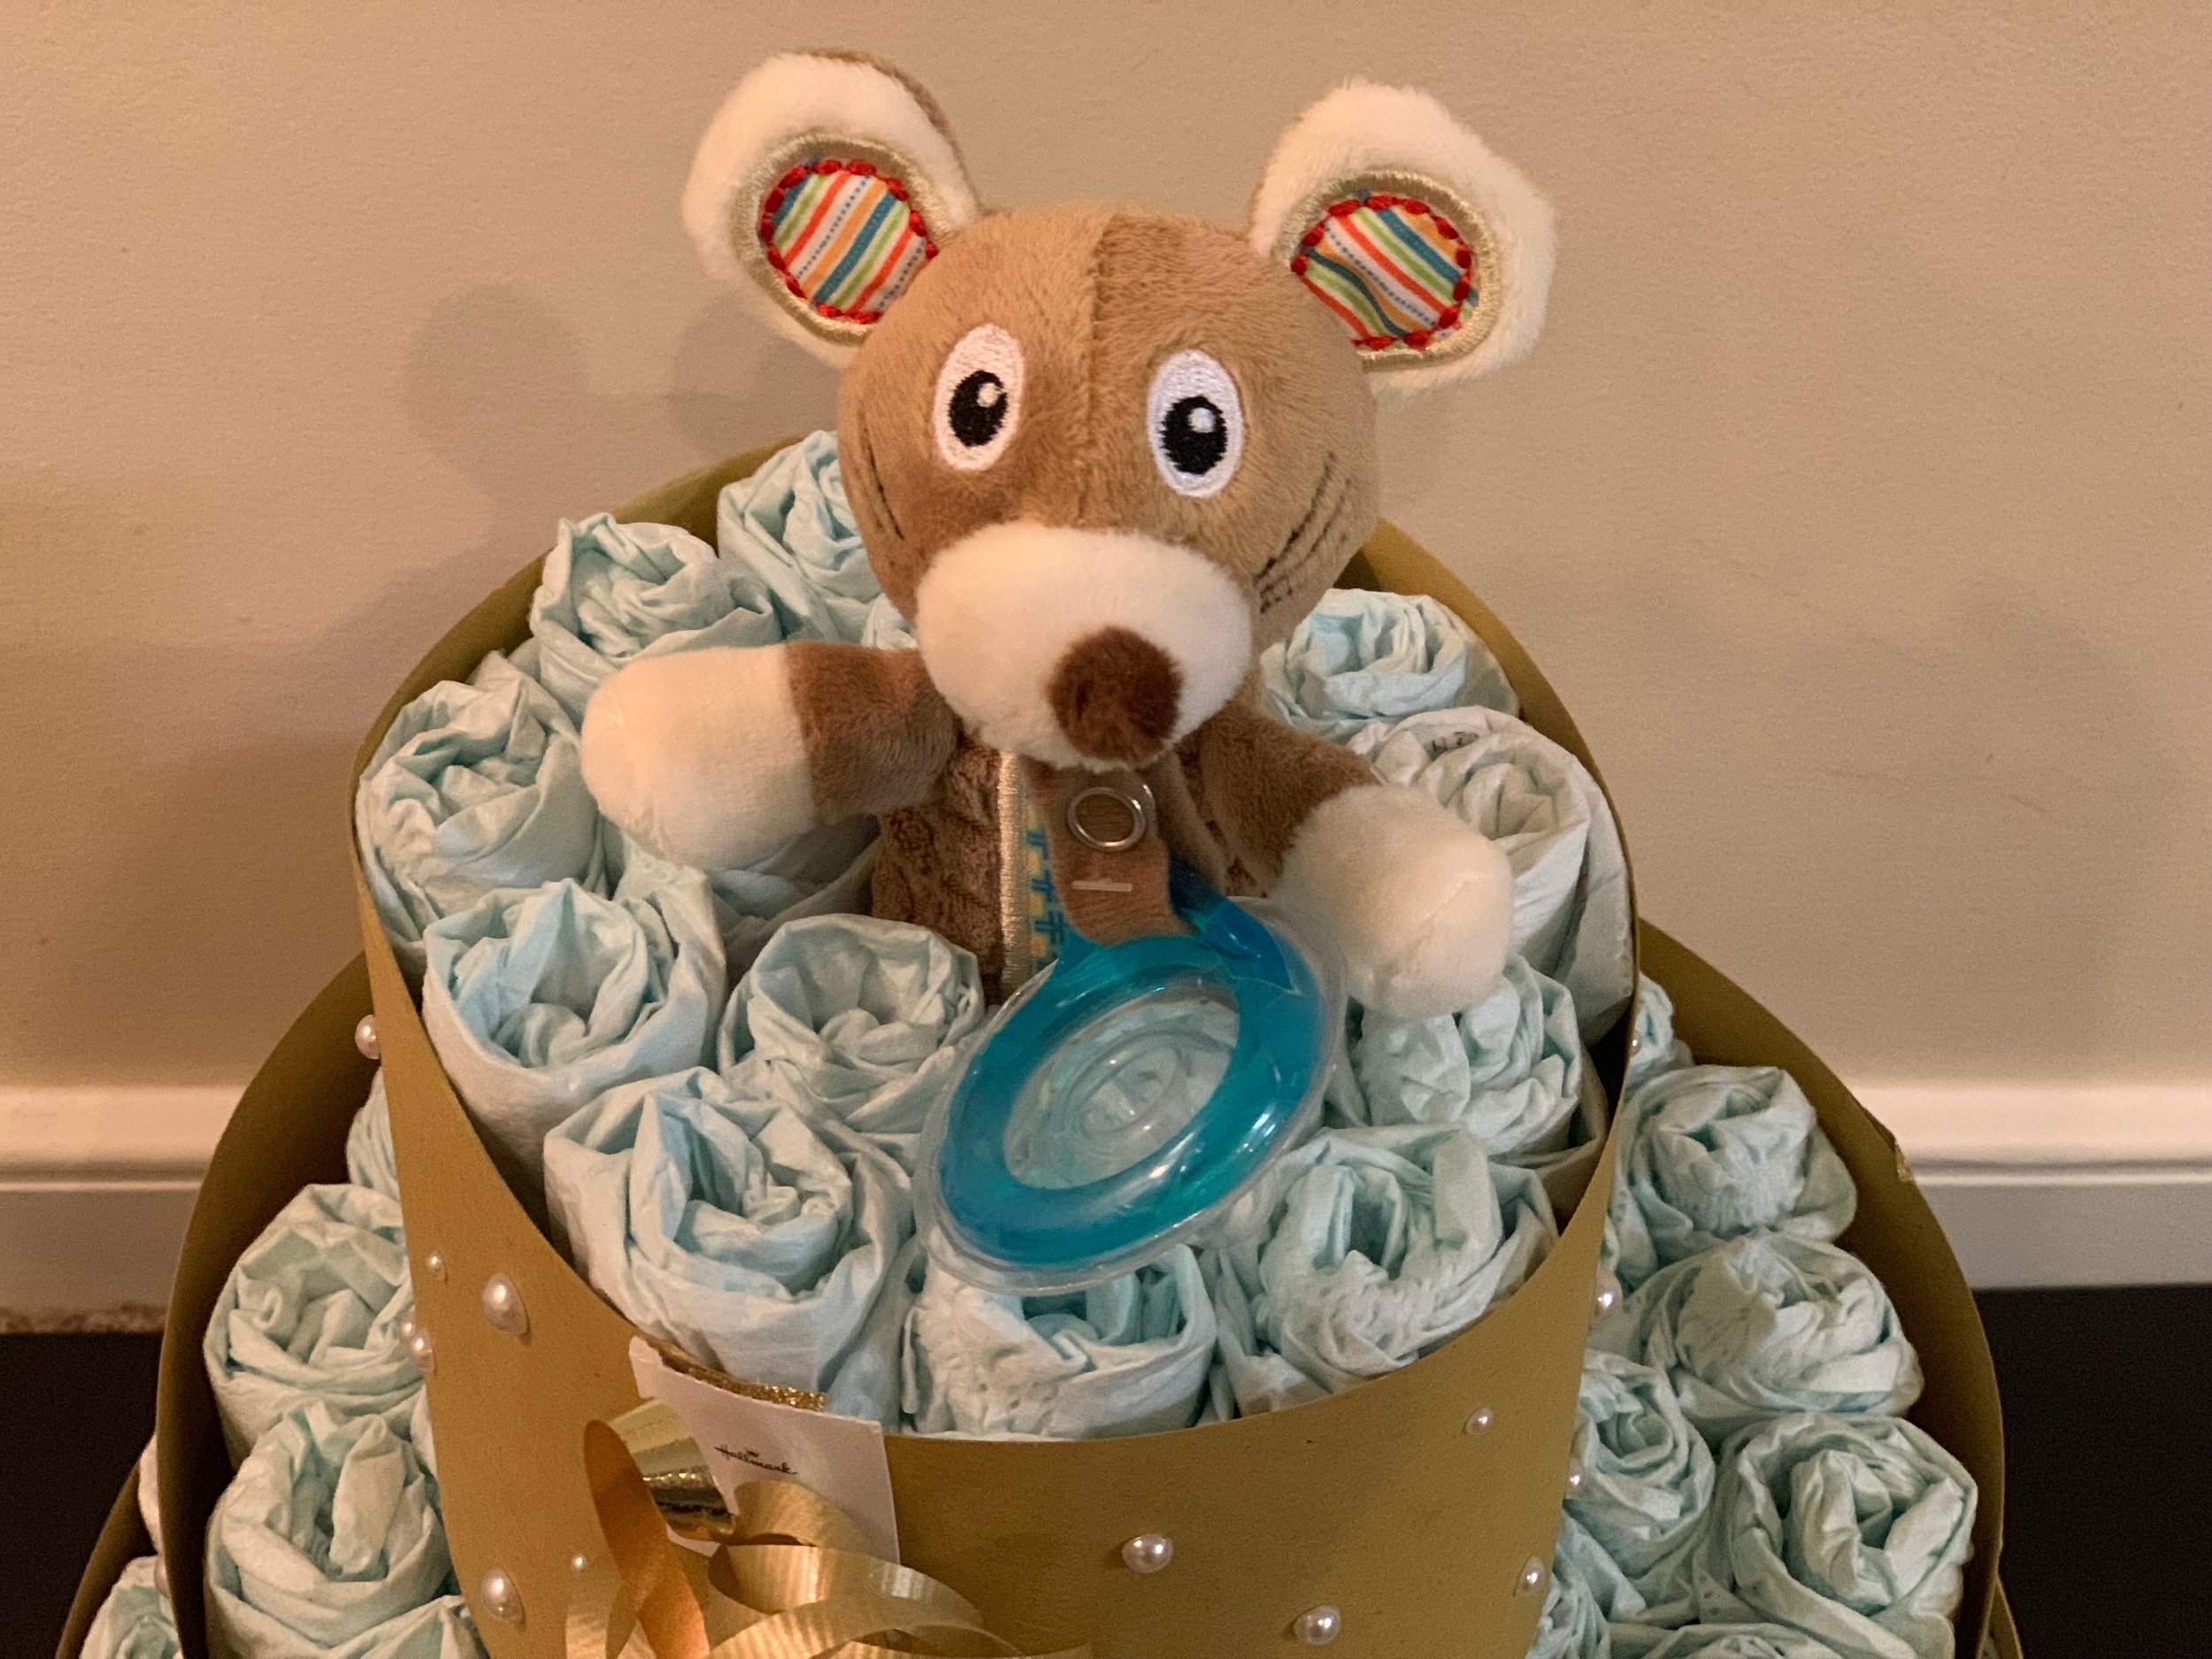
I bought two gold gift wrap bows and hot glued to both sides on the bottom tier. Added self sticking white pearls and sparkly gold washy tape to cover the seams. Added a gold bow to make it look like a present. Then tucked in an animal pacifier as the cake topper.

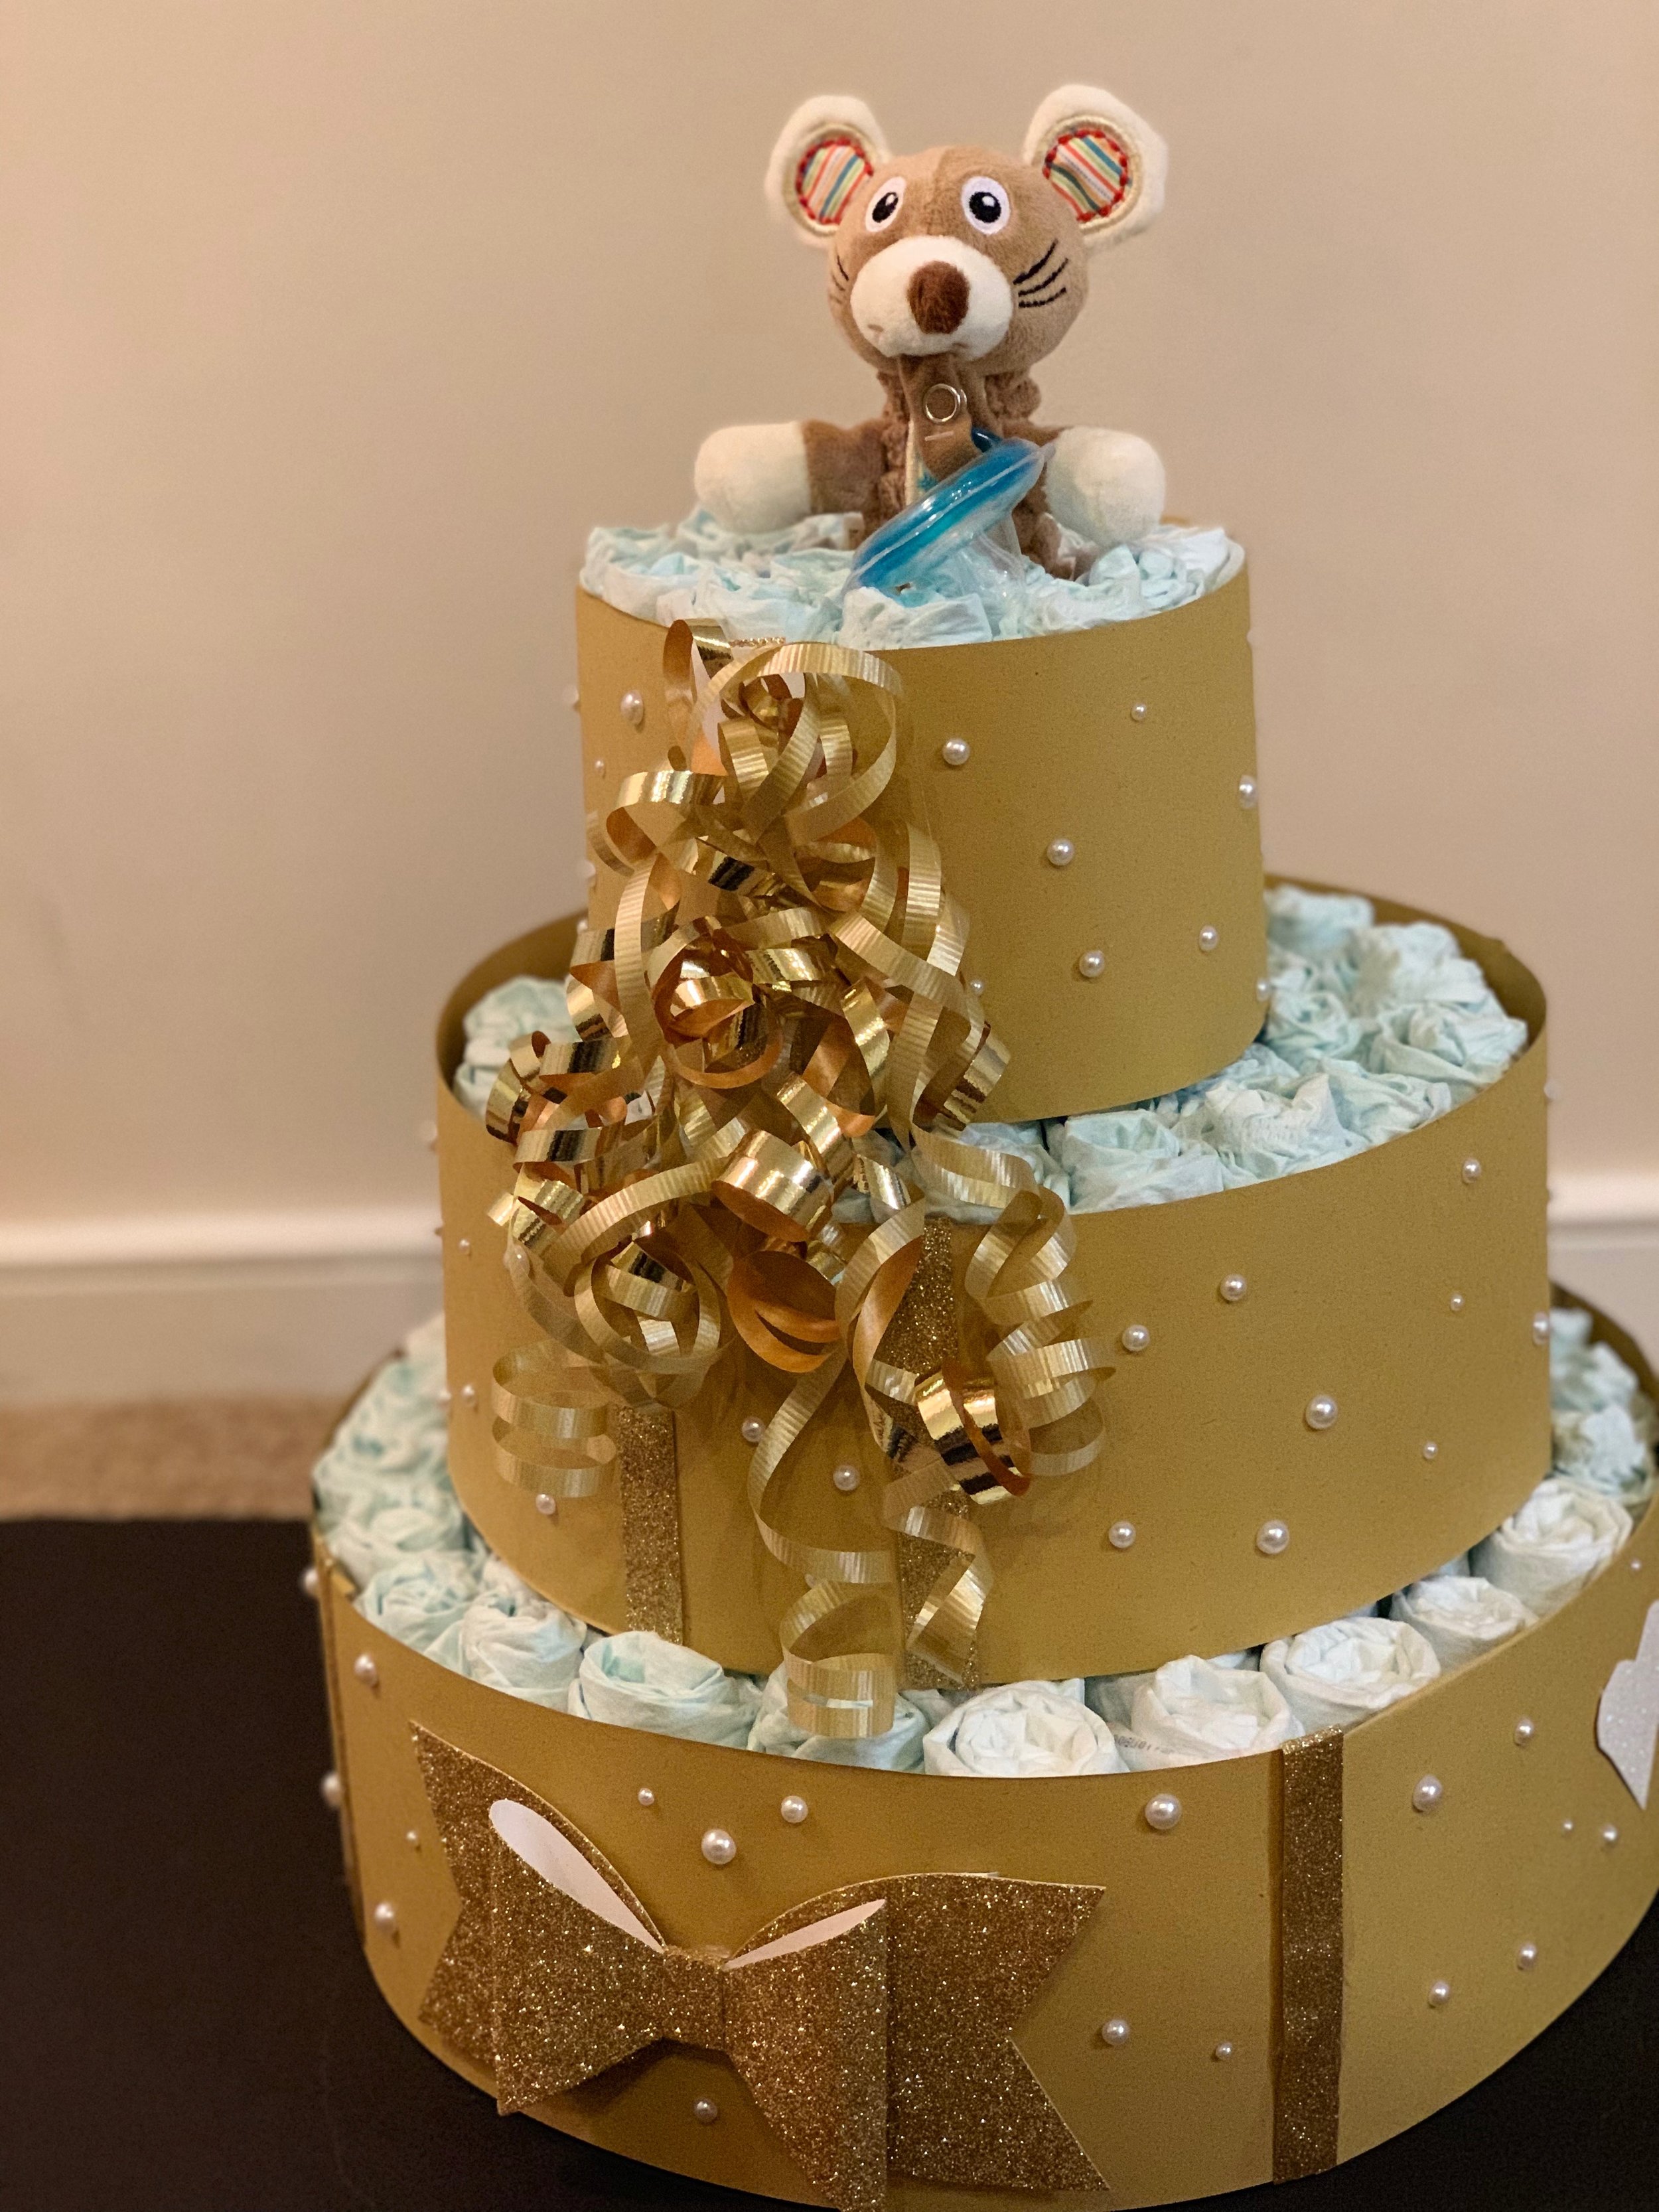
I wanted to make the cake very simplistic and cute. I know there are various forms of diaper cakes to where you can add shoes, lotion, baby wash, toys, etc. but I didn’t want the cake to look overwhelming.
Like I said the options are endless.
Keep in mind the cake is not secured to the cardboard base. I didn’t know the best way to do that, which is why I did not cut the card board into a circle because I wanted to make sure the cake couldn’t slide off.
I hope that was all simplistic enough. If you have any questions, comments, or even suggestions, please leave them down below! I want to try a more elaborate one next! It was a lot of fun making it.
Love & Light,
Jalesa